How to assemble your Hyphen Outdoor ping-pong table
To assemble your Hyphen outdoor ping-pong table, please follow the instructions below. At least two people, ideally four, are required at all stages to assemble your table. All the tools you will need to assemble your Hyphen table are provided. The use of a power screwdriver is strictly prohibited, as it could damage certain parts and make them unusable.
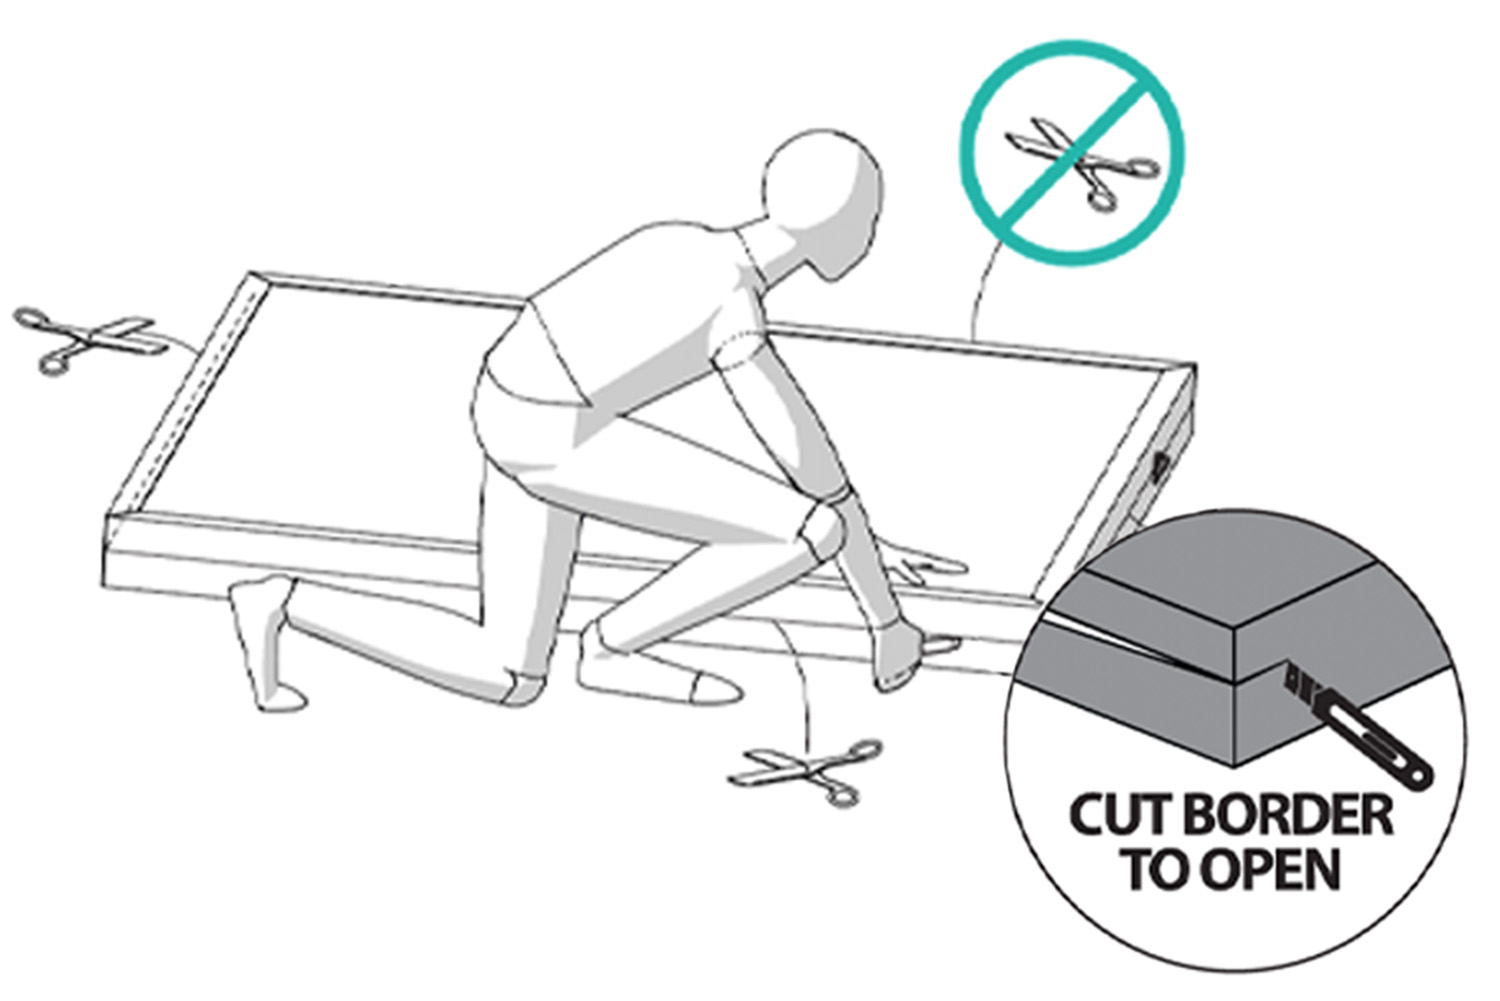
Cut the side of the box and use the cardboard as a support while assembling your table to avoid any risk of scratching. Place the two tabletops facing each other (see video opposite).
Then raise one of the two tabletops to make the next step easier.
Steps 1 & 2
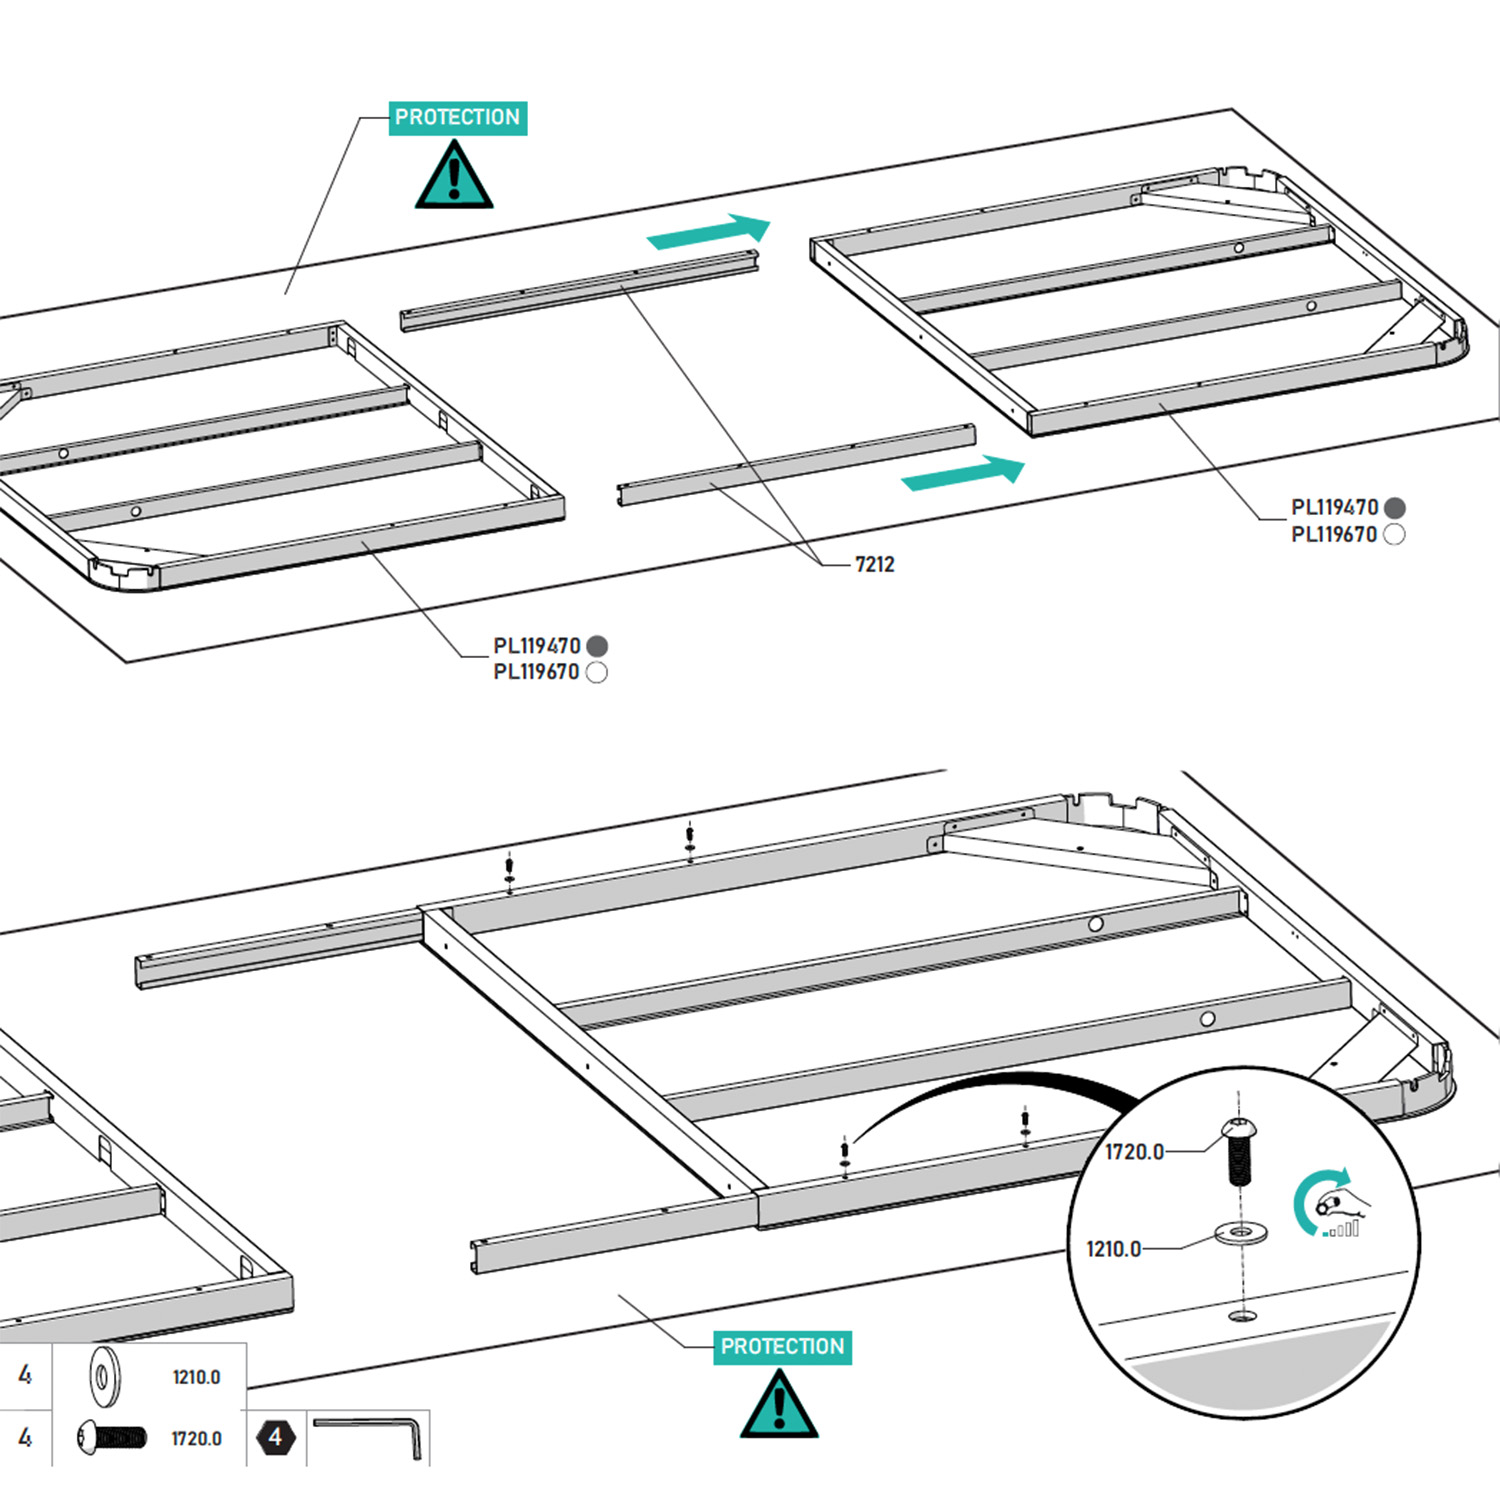
Insert the fishplate (7212), with the empty side facing inwards, into the sides of one of the two tabletops, then align the first two holes with the tabletop holes, letting the other two protrude.
Insert the washer (1210.0) and the screw (1720.0), then screw in, leaving some play.
Step 3
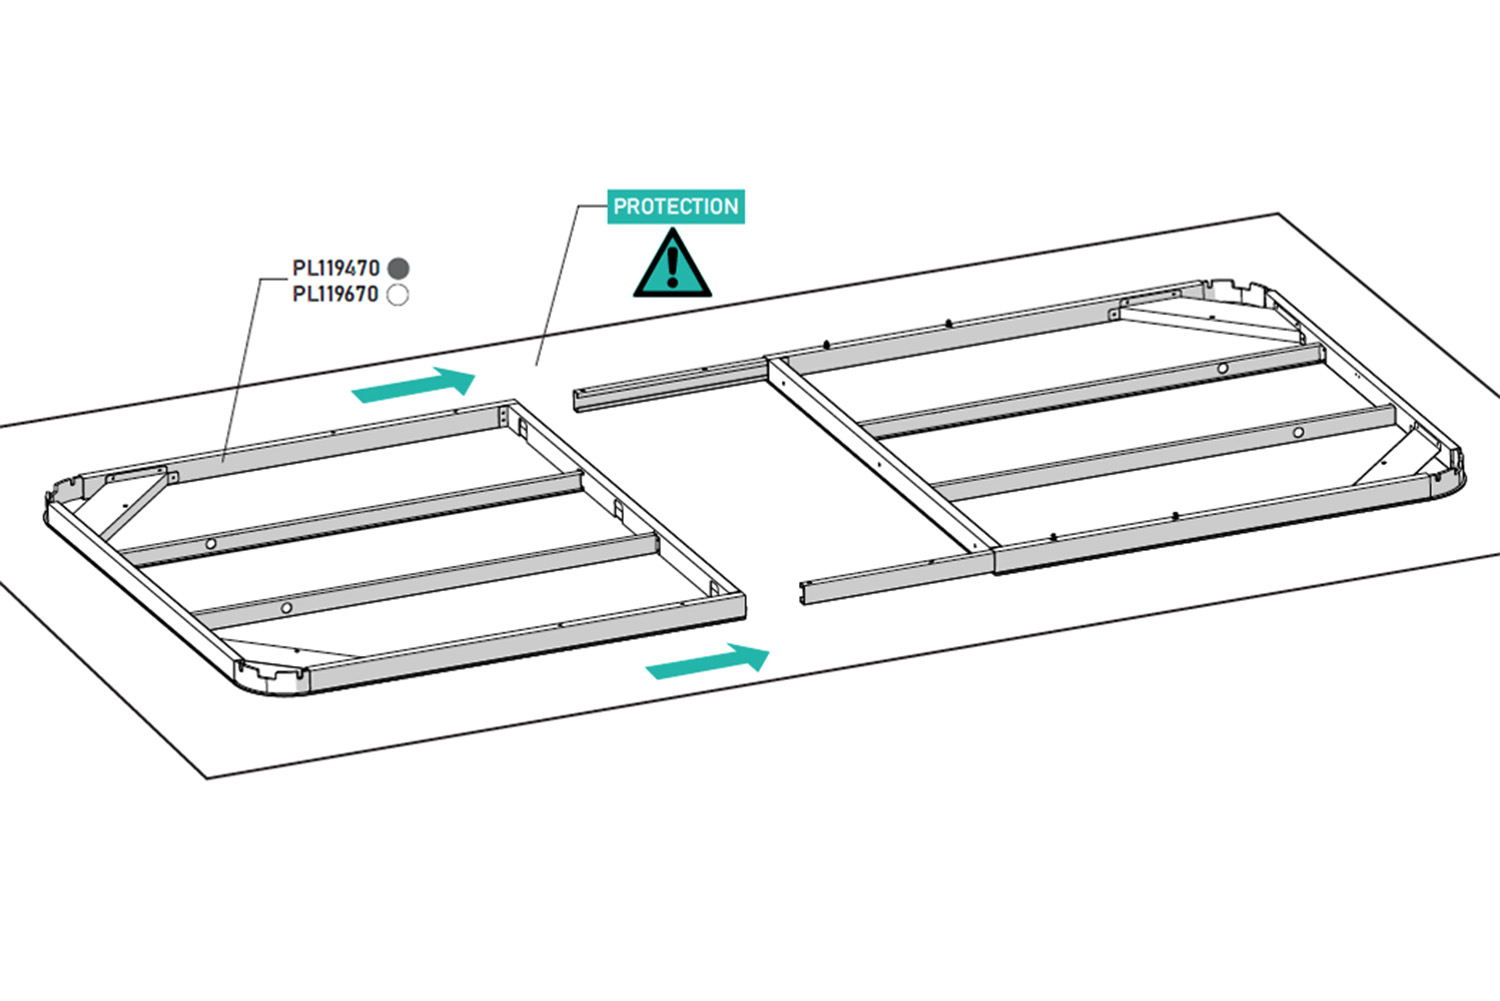
Insert the second tabletop onto the fishplate (7212), ensuring that the holes on the second tabletop are also aligned.
Step 4
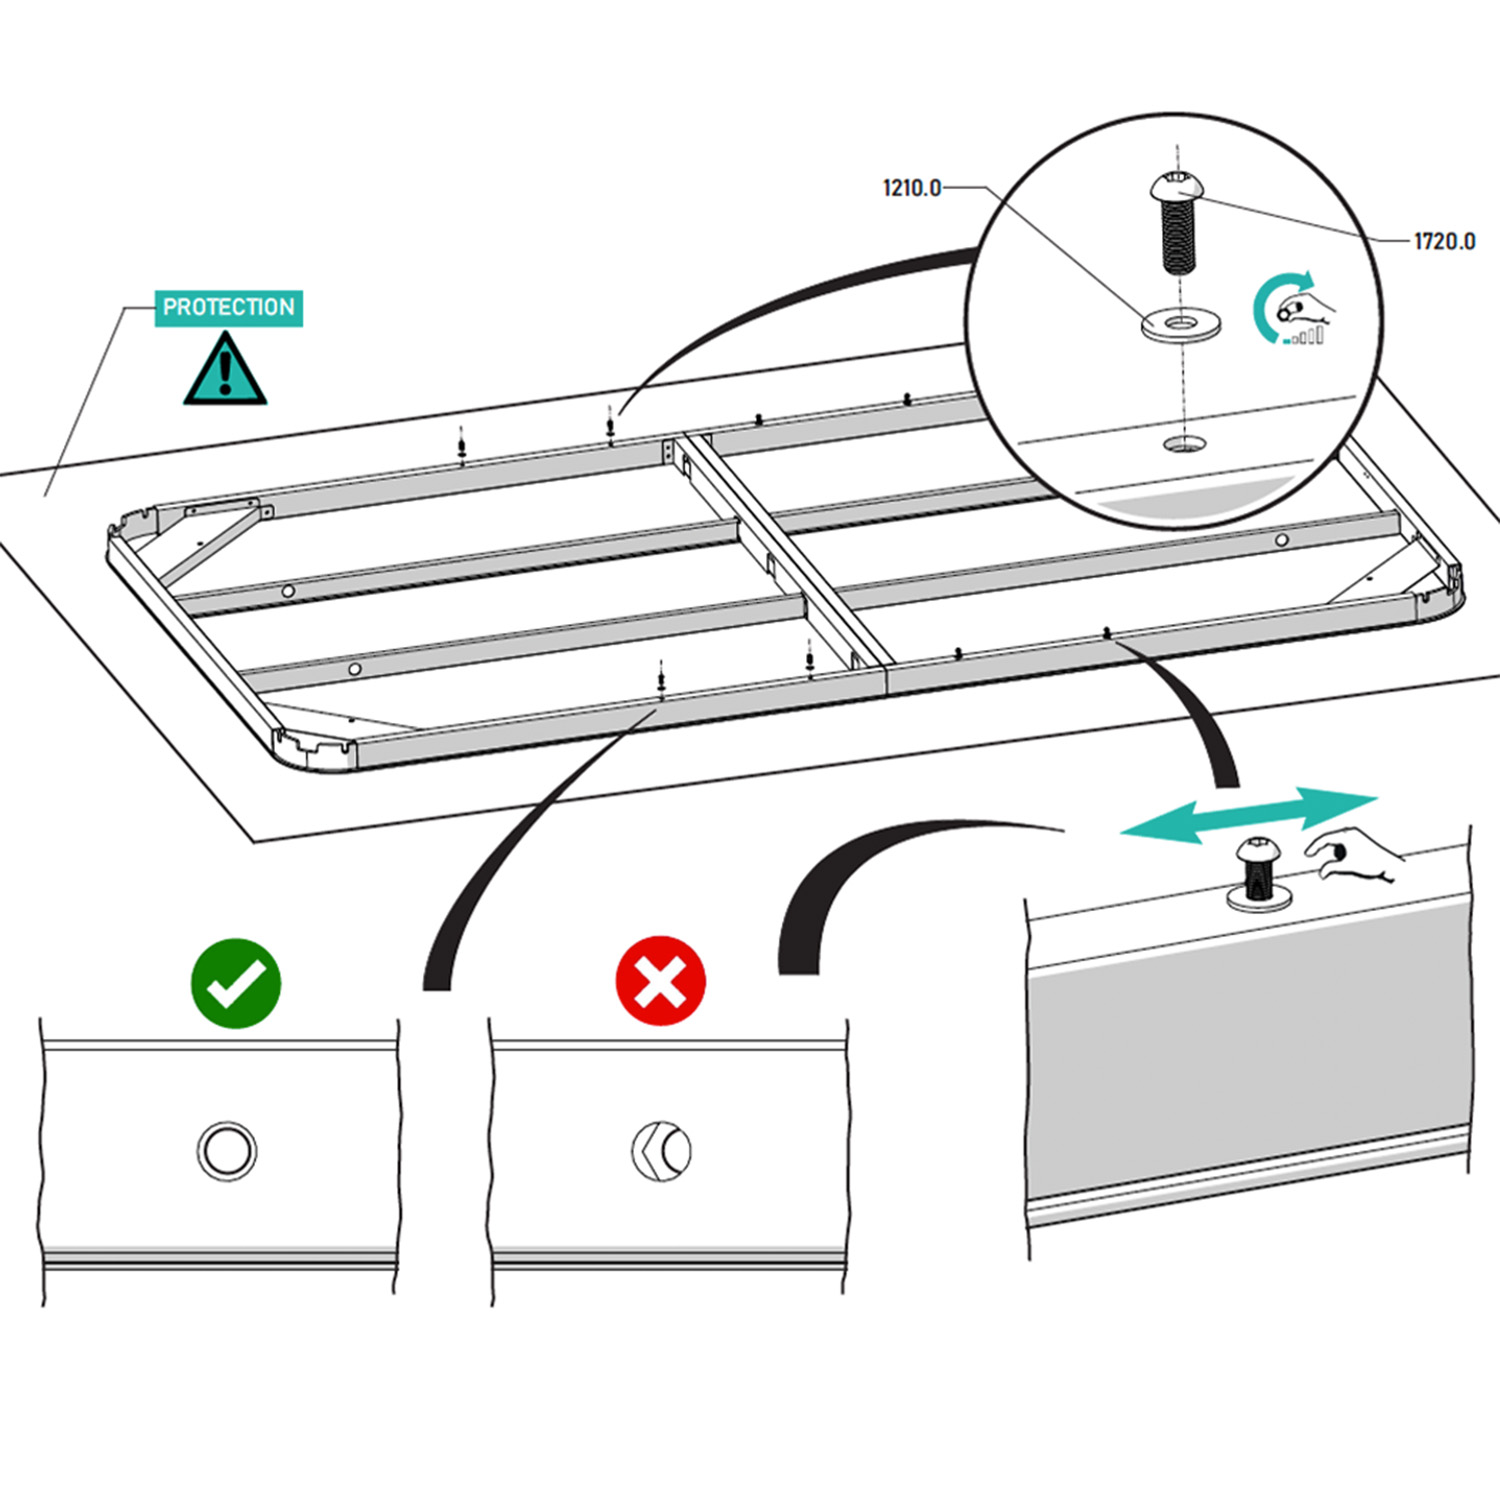
Insert the washer (1210.0) and the screw (1720.0), then screw in, leaving some play.
Step 5
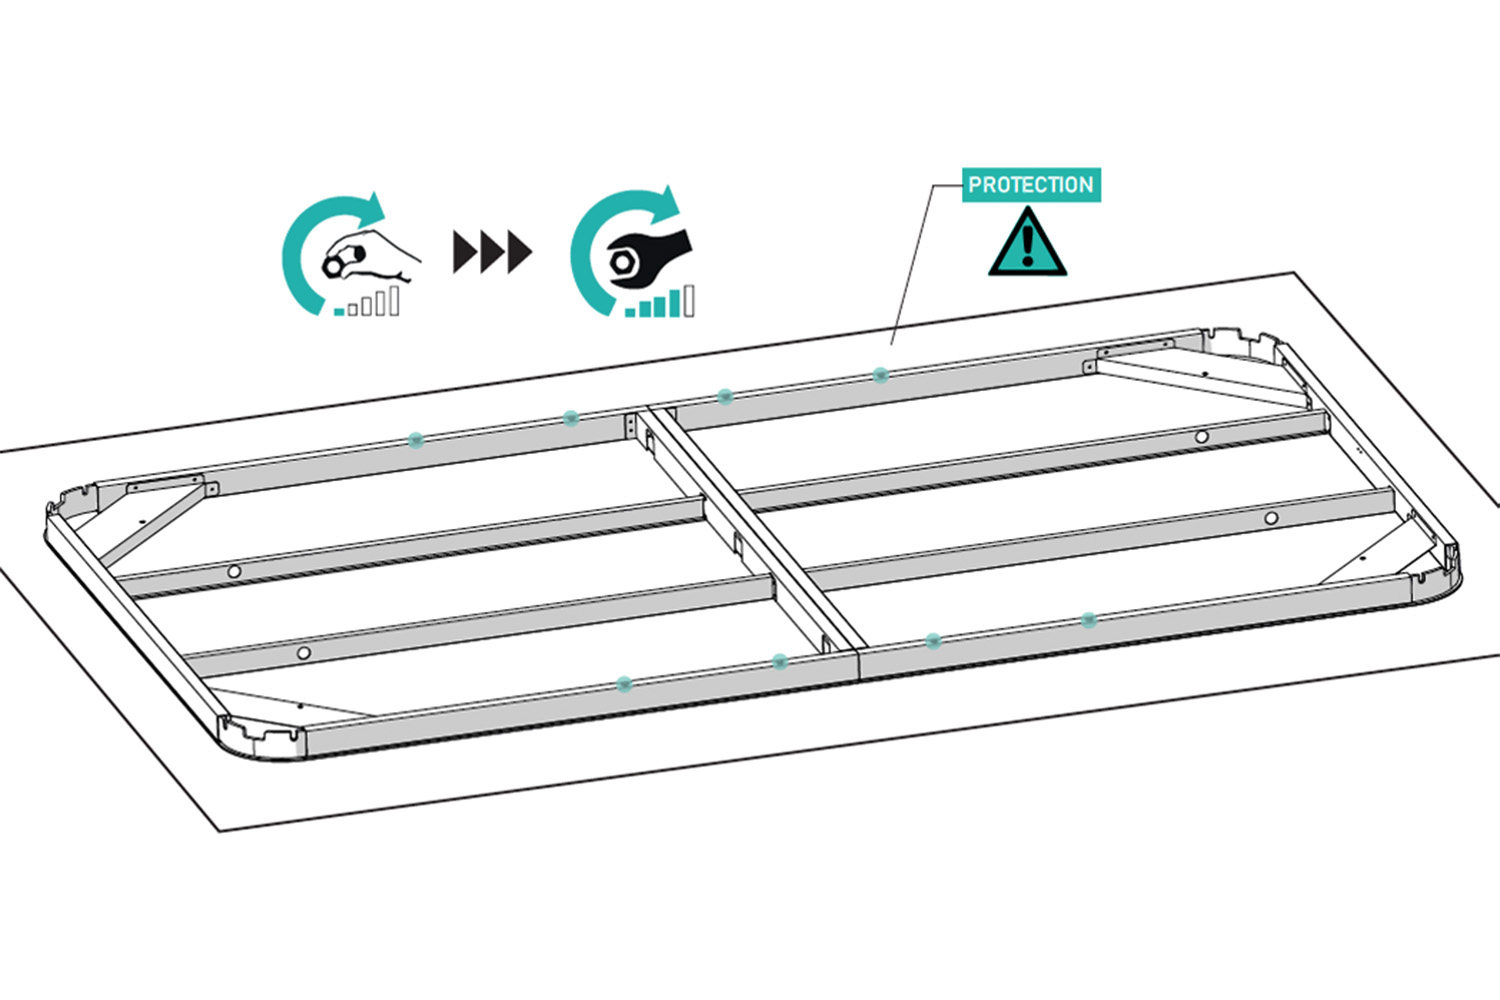
Securely tighten all screws using the provided Allen key.
Step 6
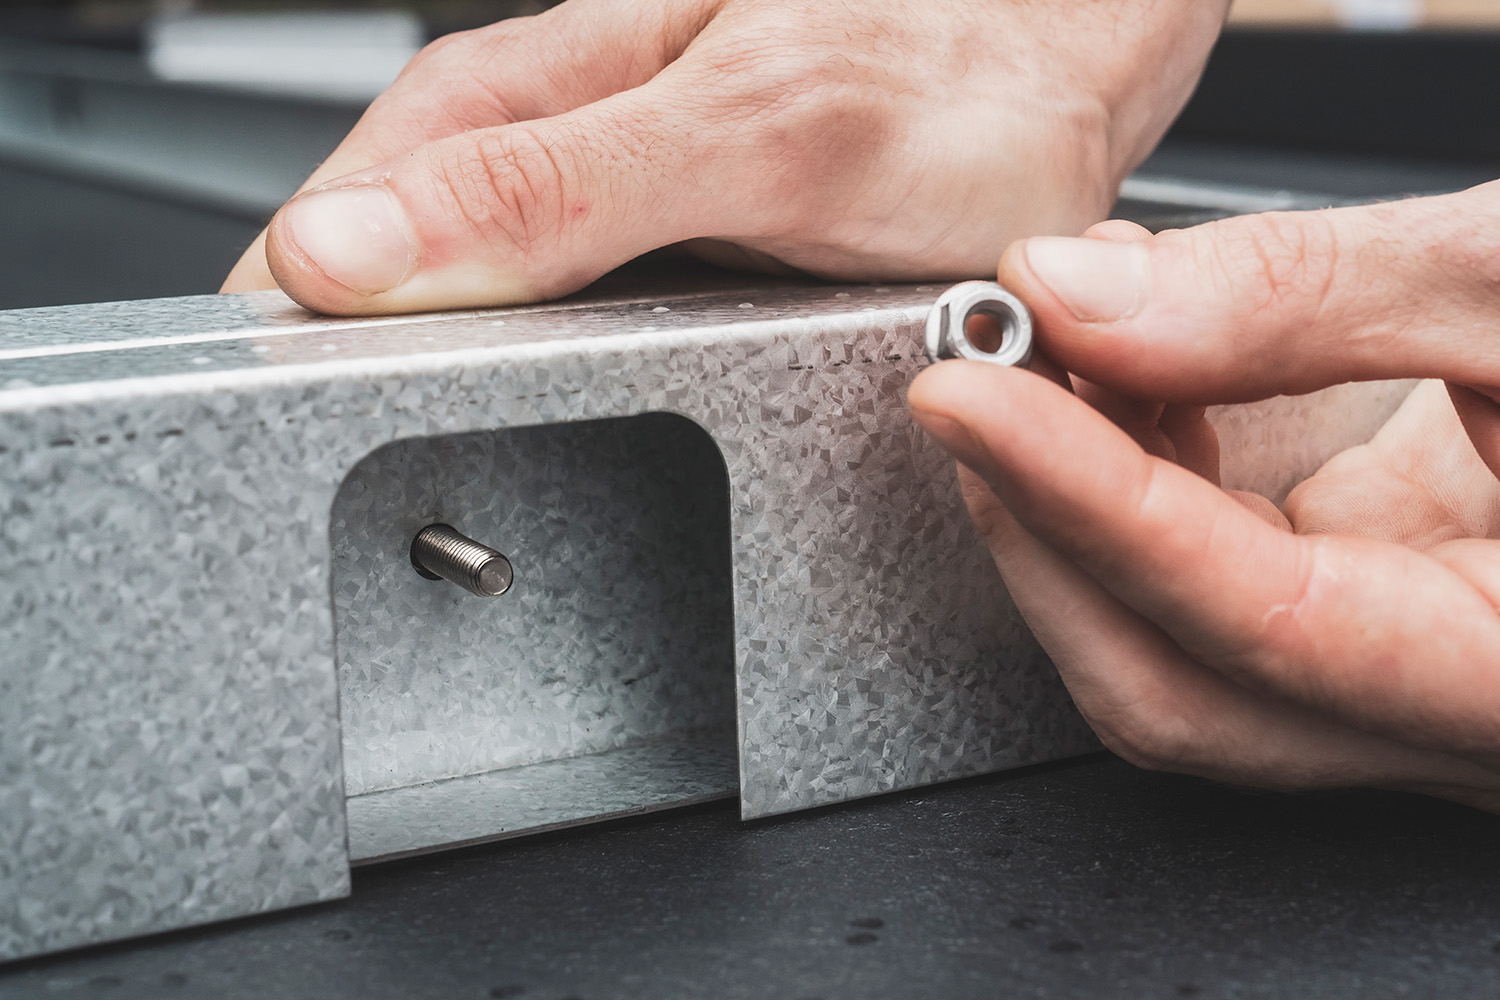
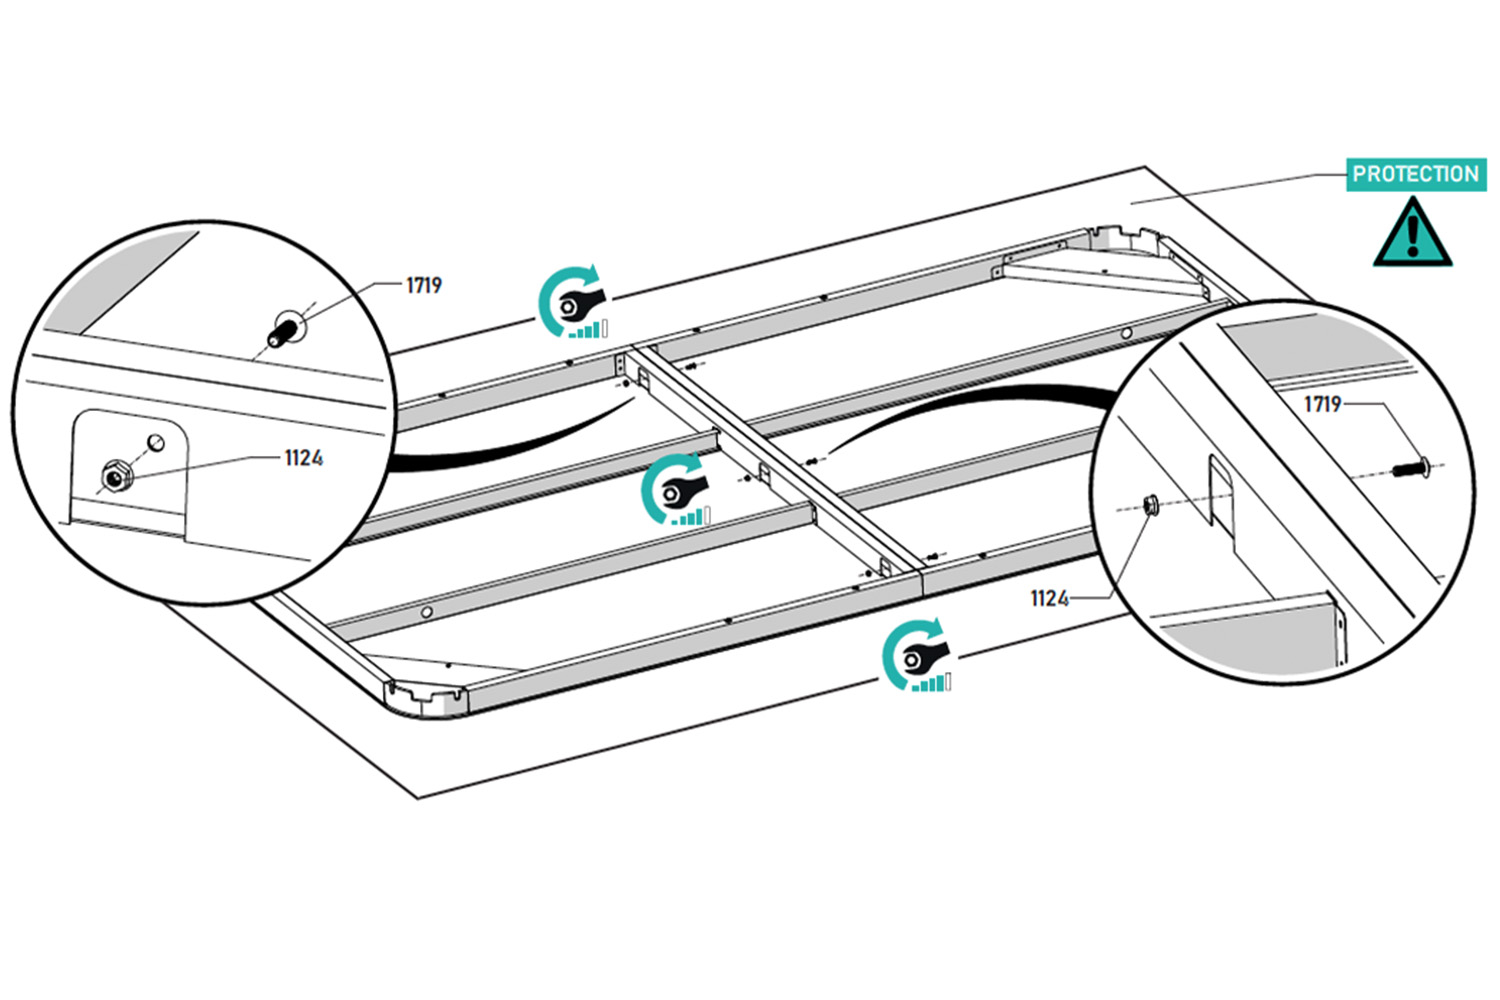
Connect the two tabletops in the center using the screws (1719) and nuts (1124).
Step 7
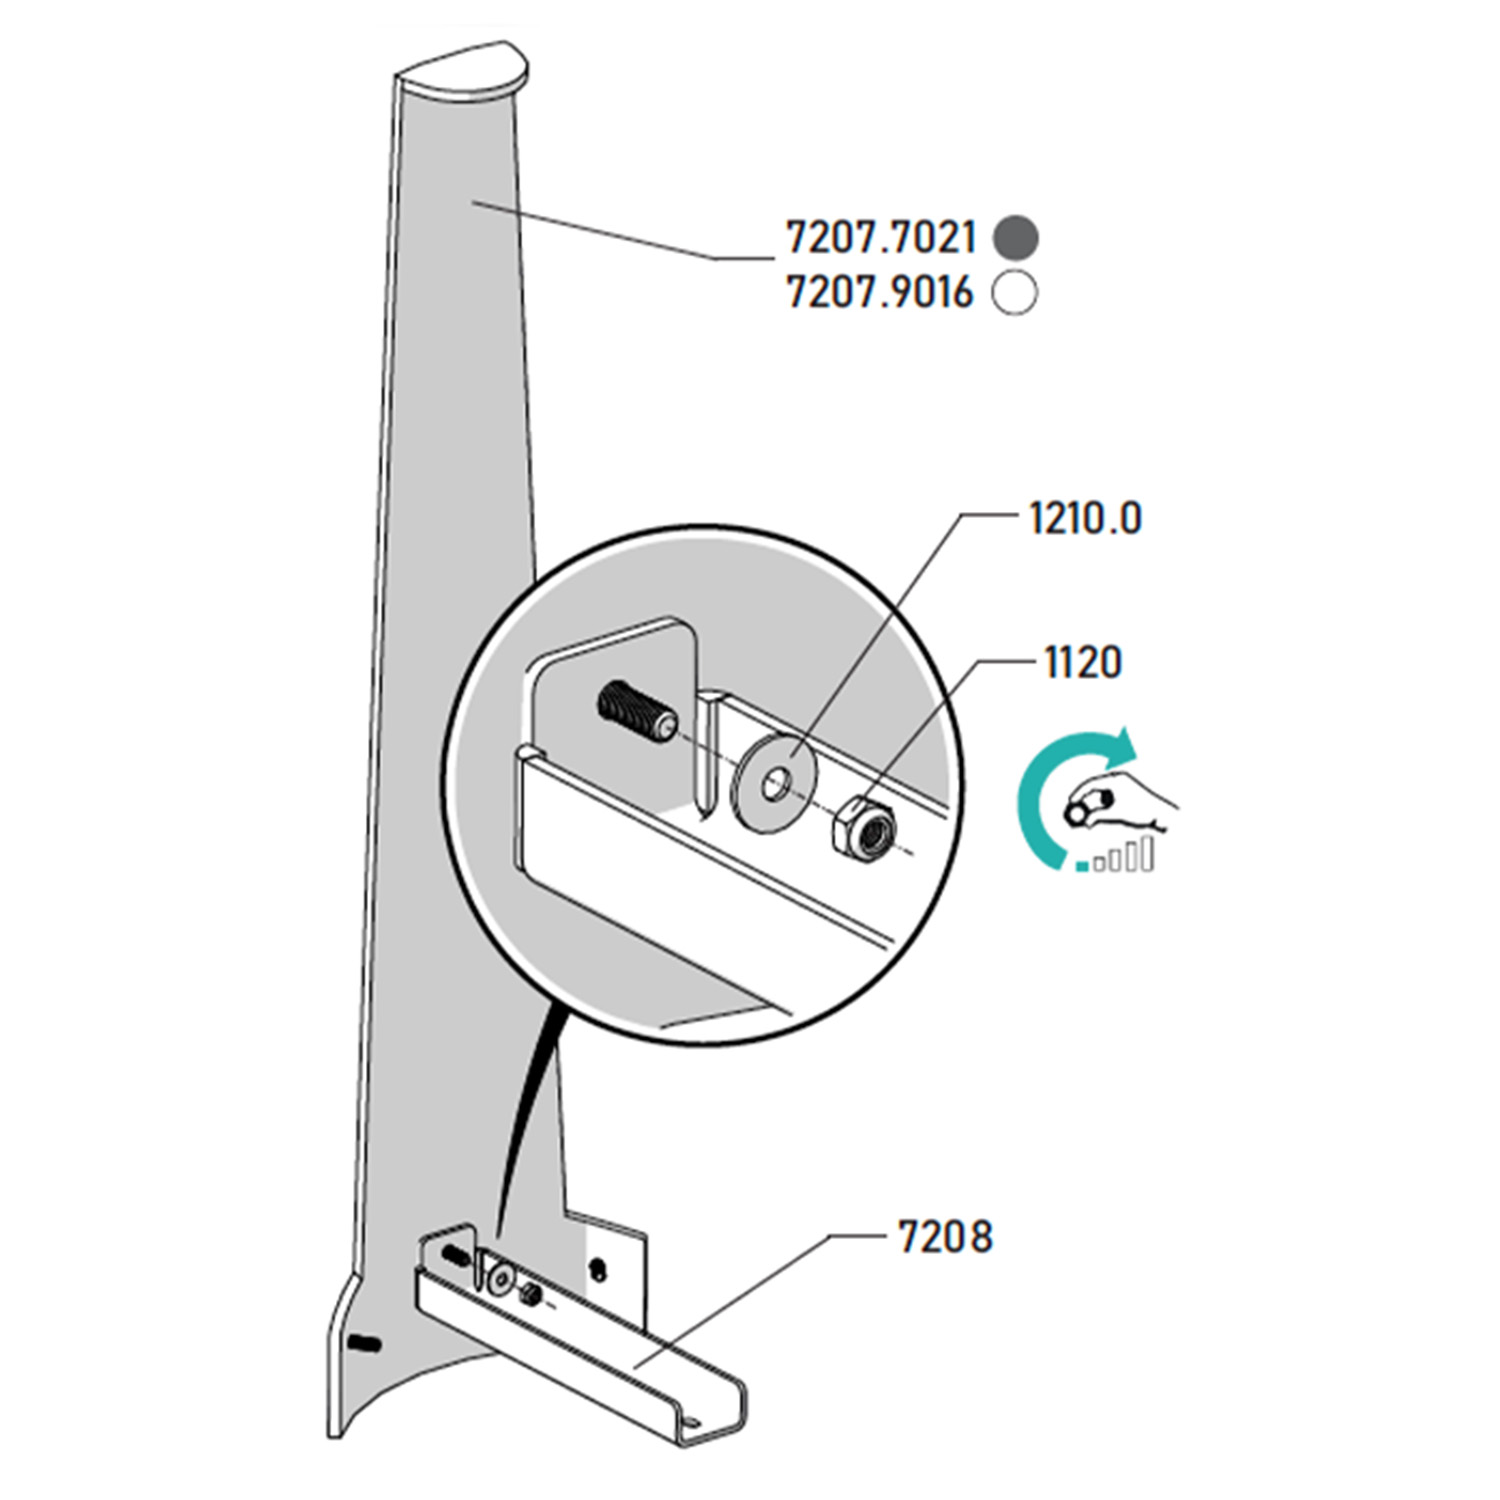
Position the leg bracket (7208) on the central stud of the leg. Secure with the washer (1210.0) and the locknut (1120), leaving some play.
Repeat for the other three legs.
Step 8
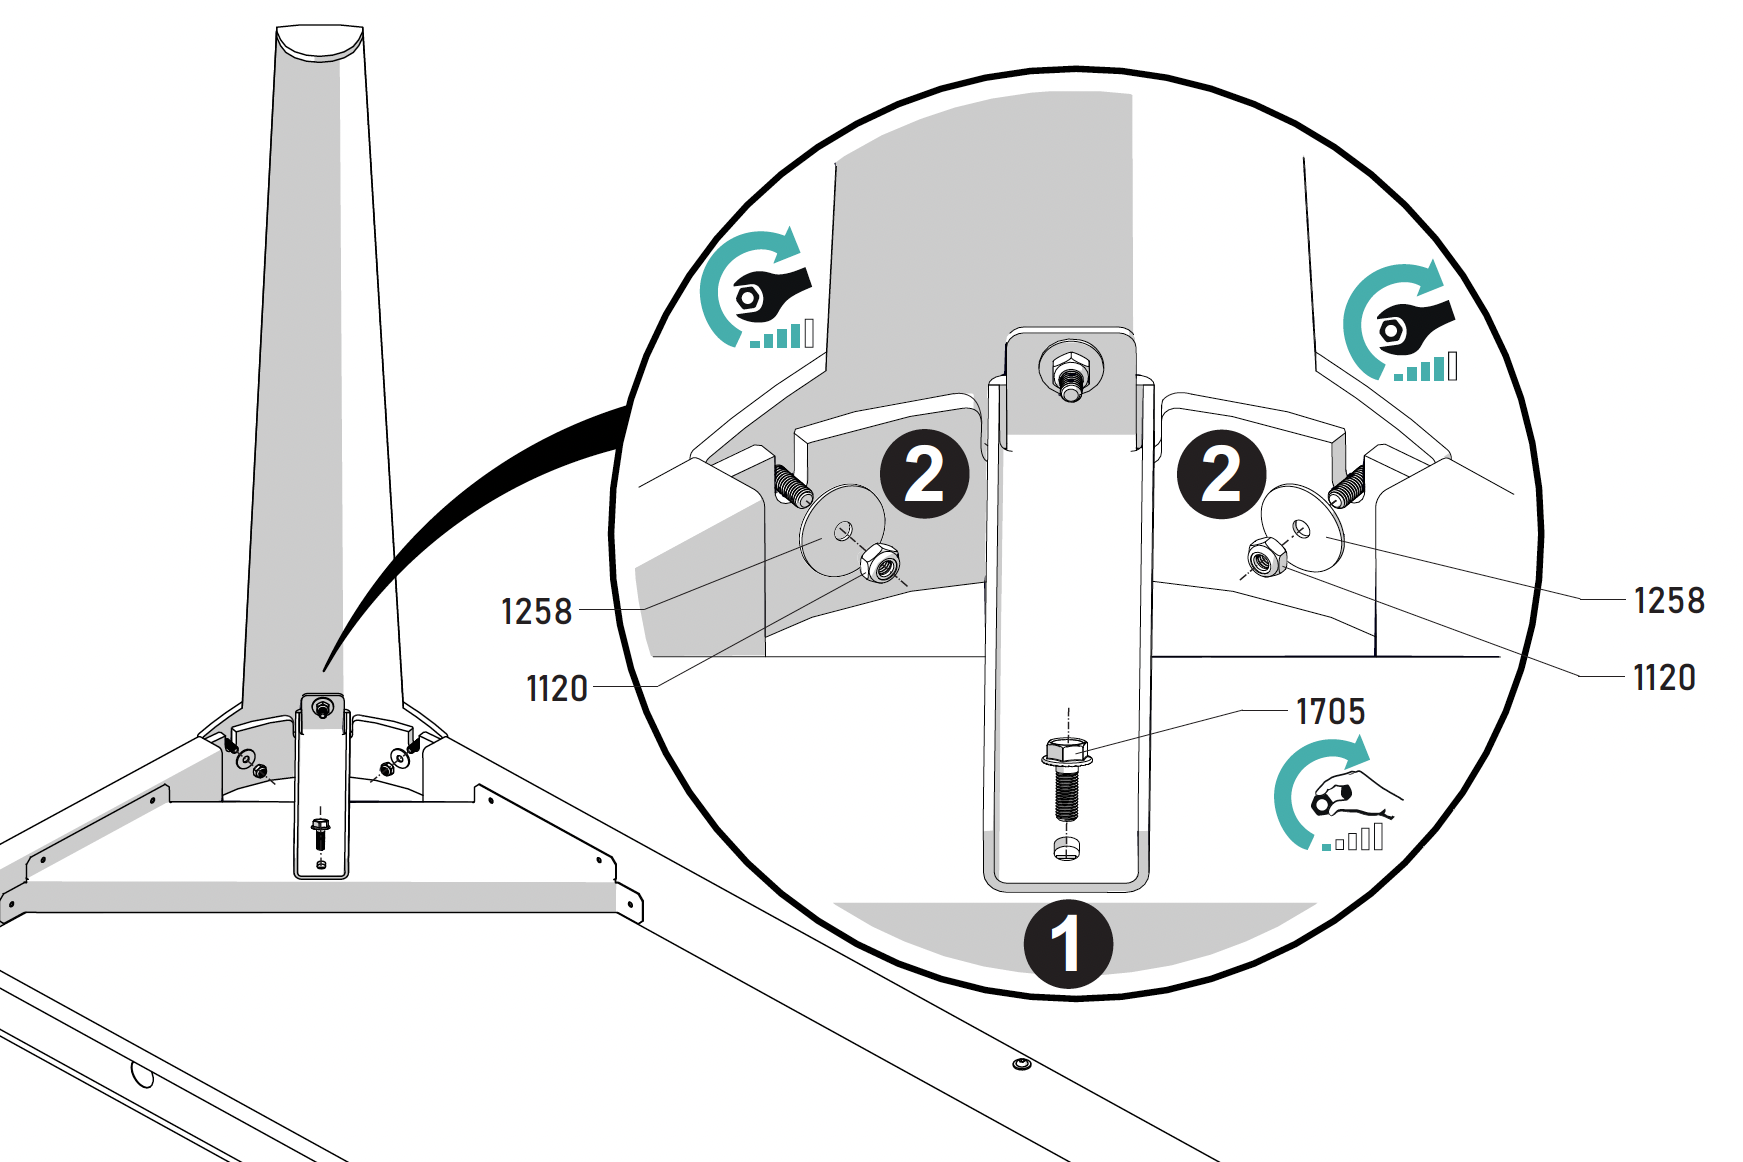
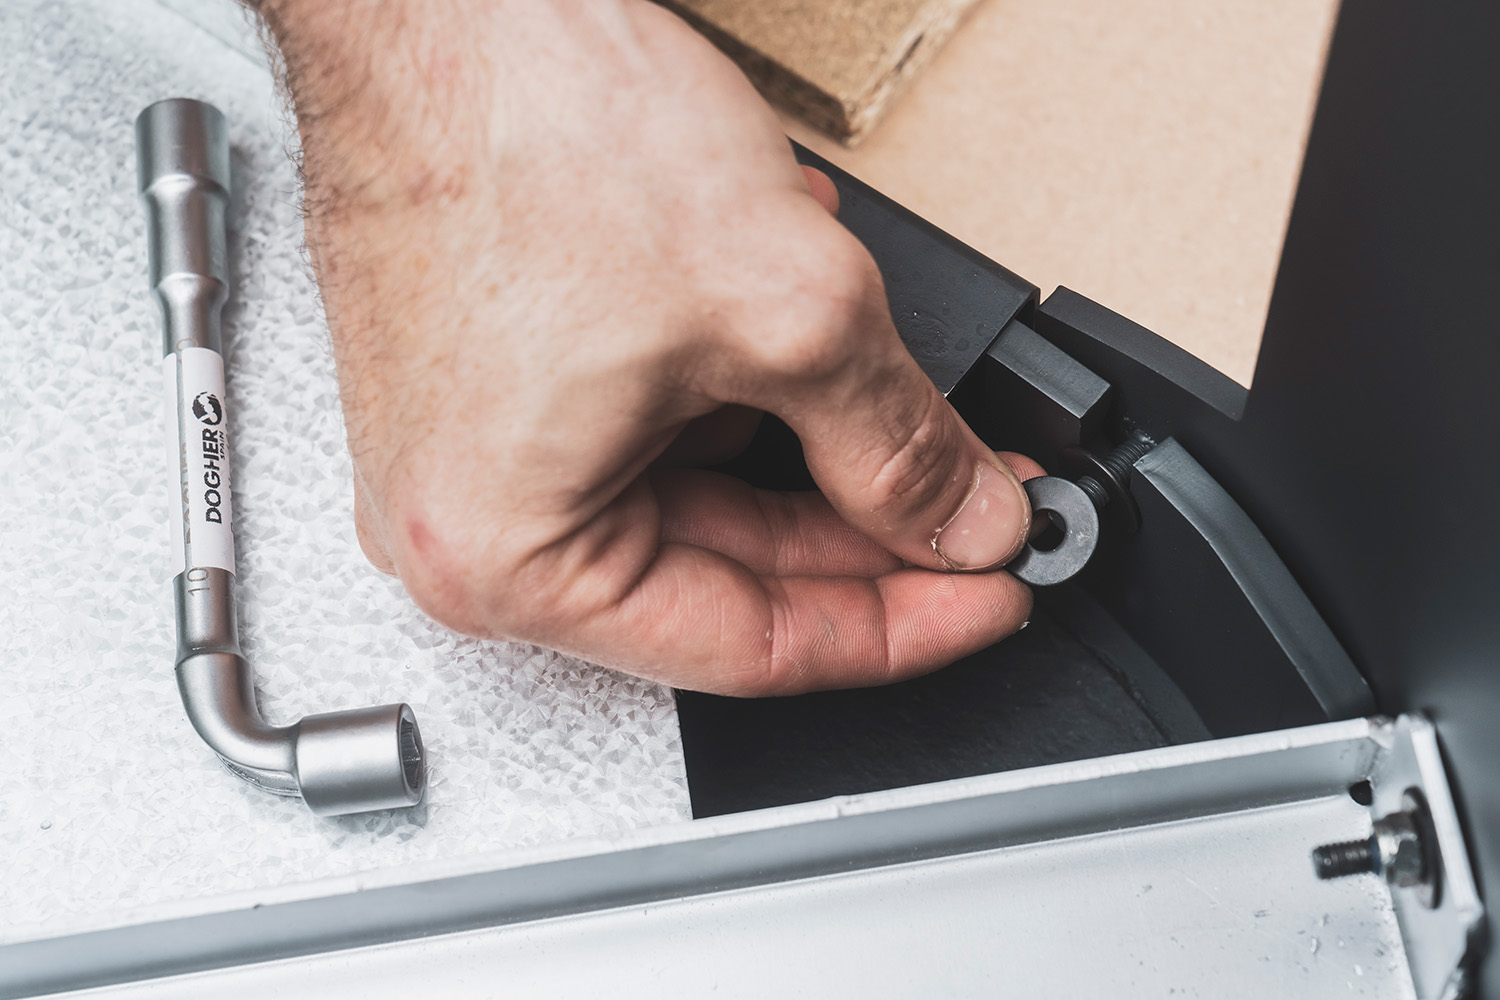
Position the leg in the corner of the tabletop, placing the studs into the tabletop notches and the bracket into the central notch.
Secure the leg to the tabletop with the washer (1258) on each side of the leg and the locknut (1120).
Also fix the leg bracket (7208) to the central reinforcement with the nut (1705).
Repeat for the other three legs.
Step 9
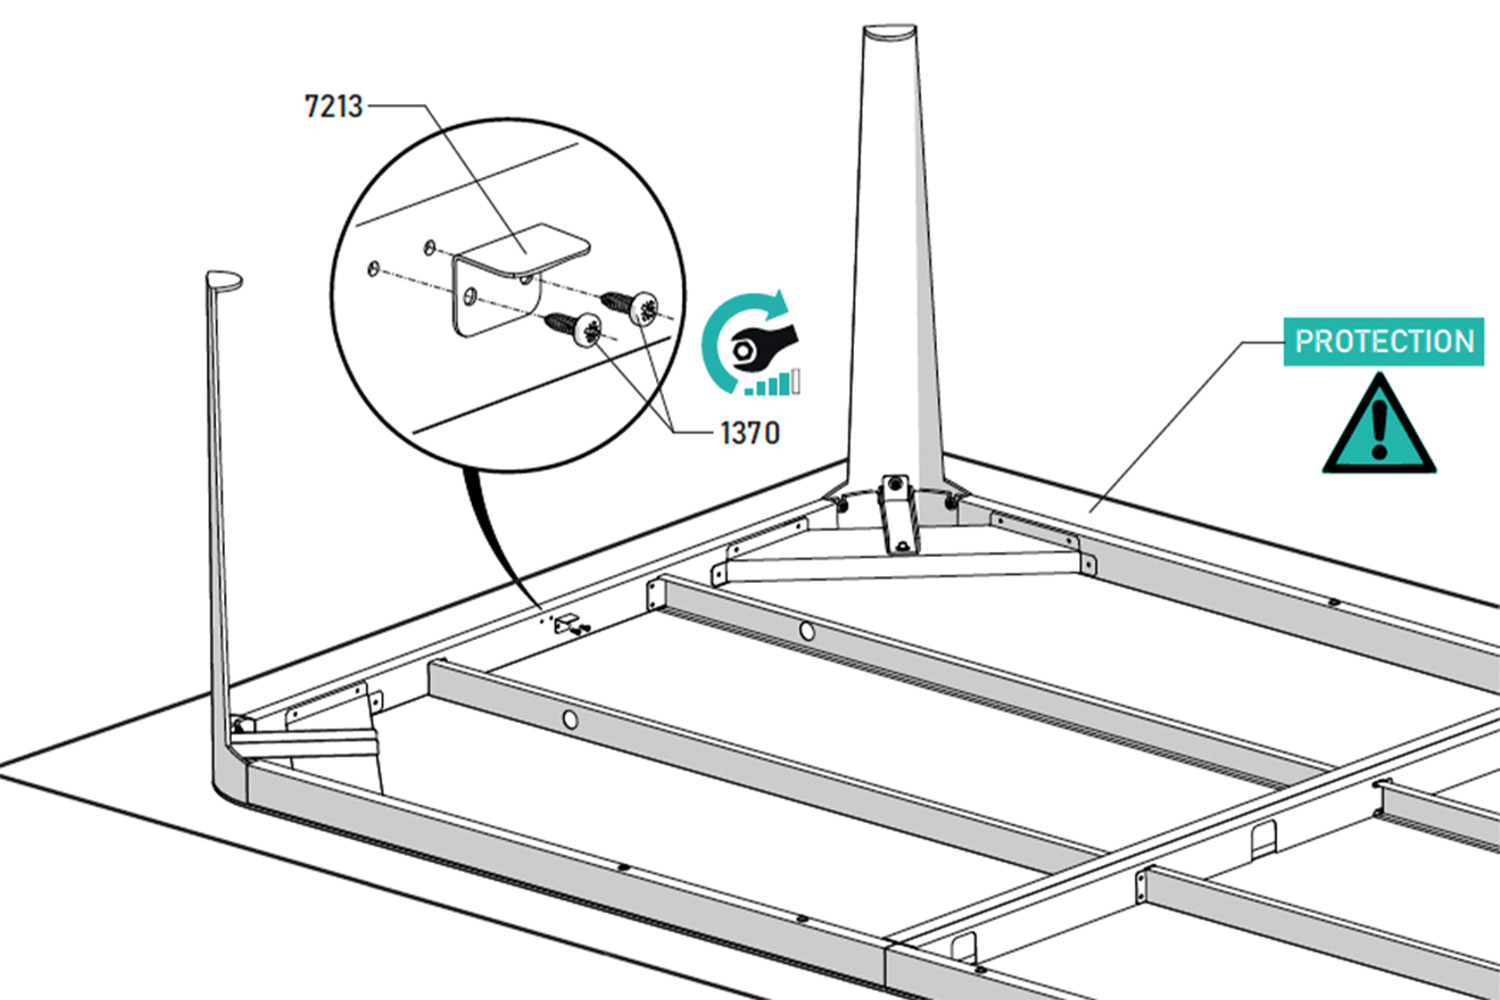
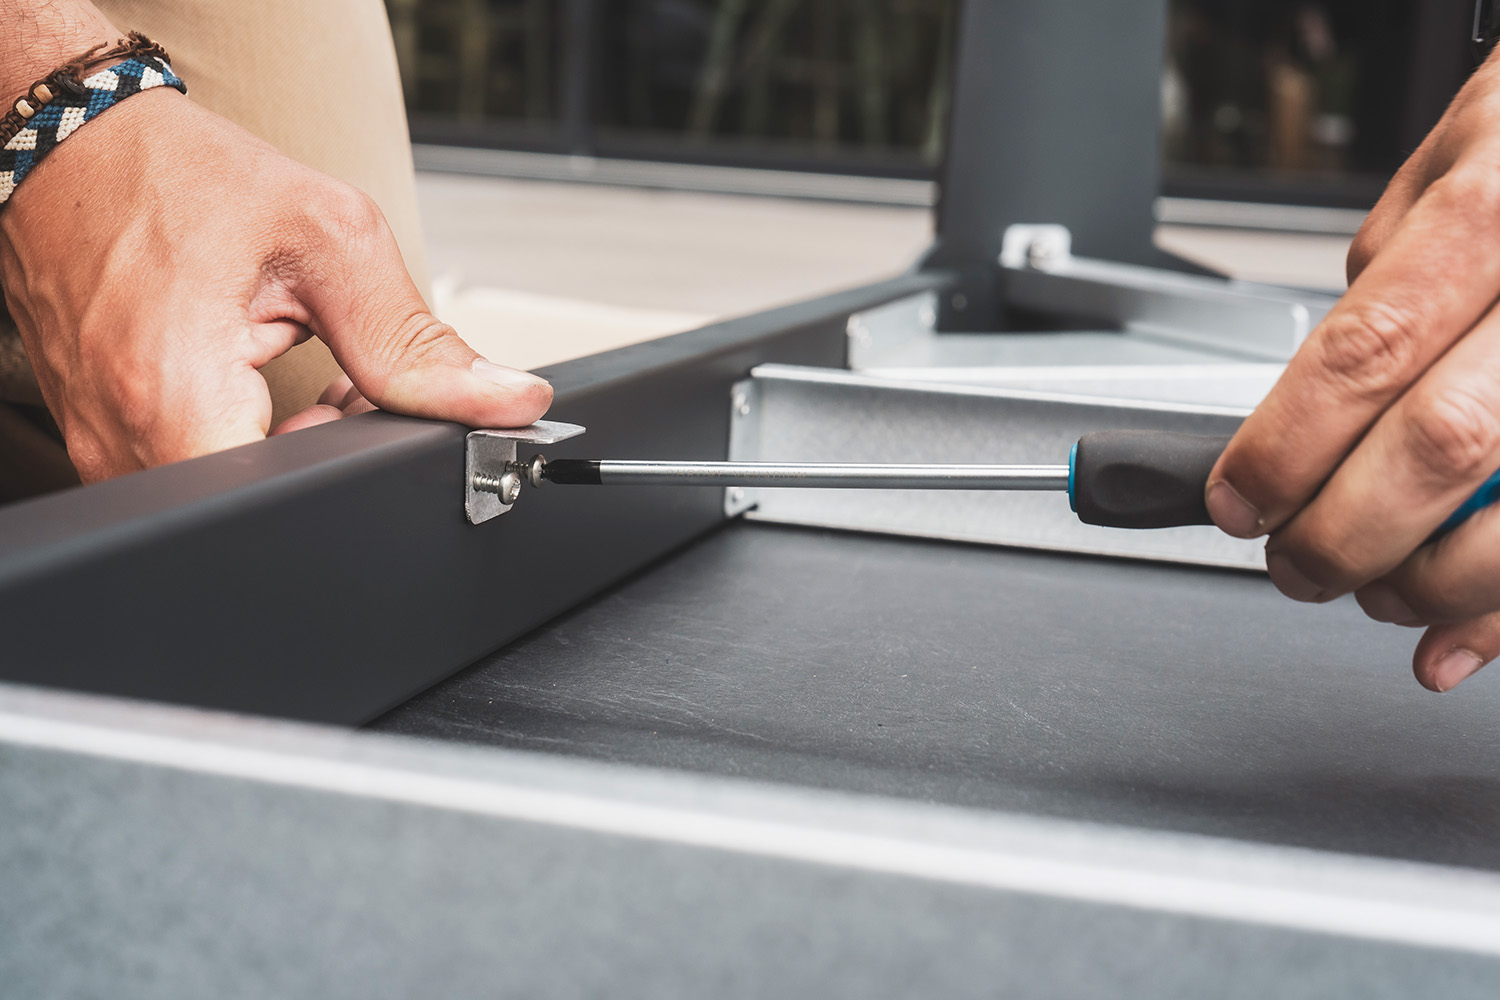
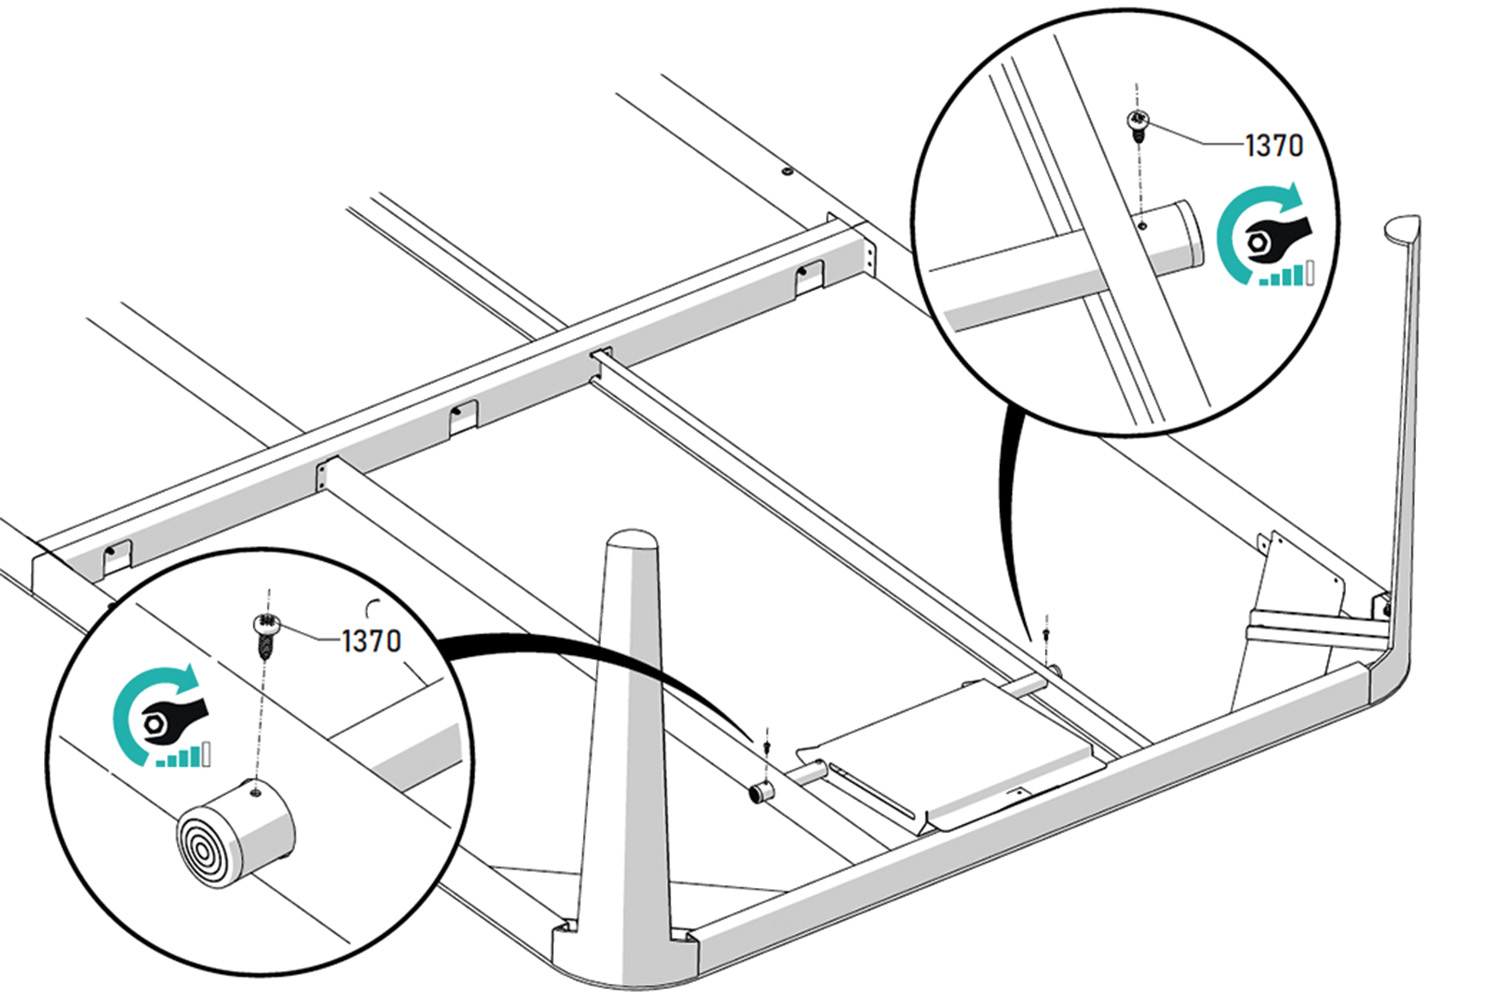
Screw the drawer magnet bracket (7213) onto the inner edge of the tabletop using the screws (1370), on either side of the table. Some effort may be required.
Please note, the magnet bracket must be oriented as shown in the diagram and photo opposite.
Step 10
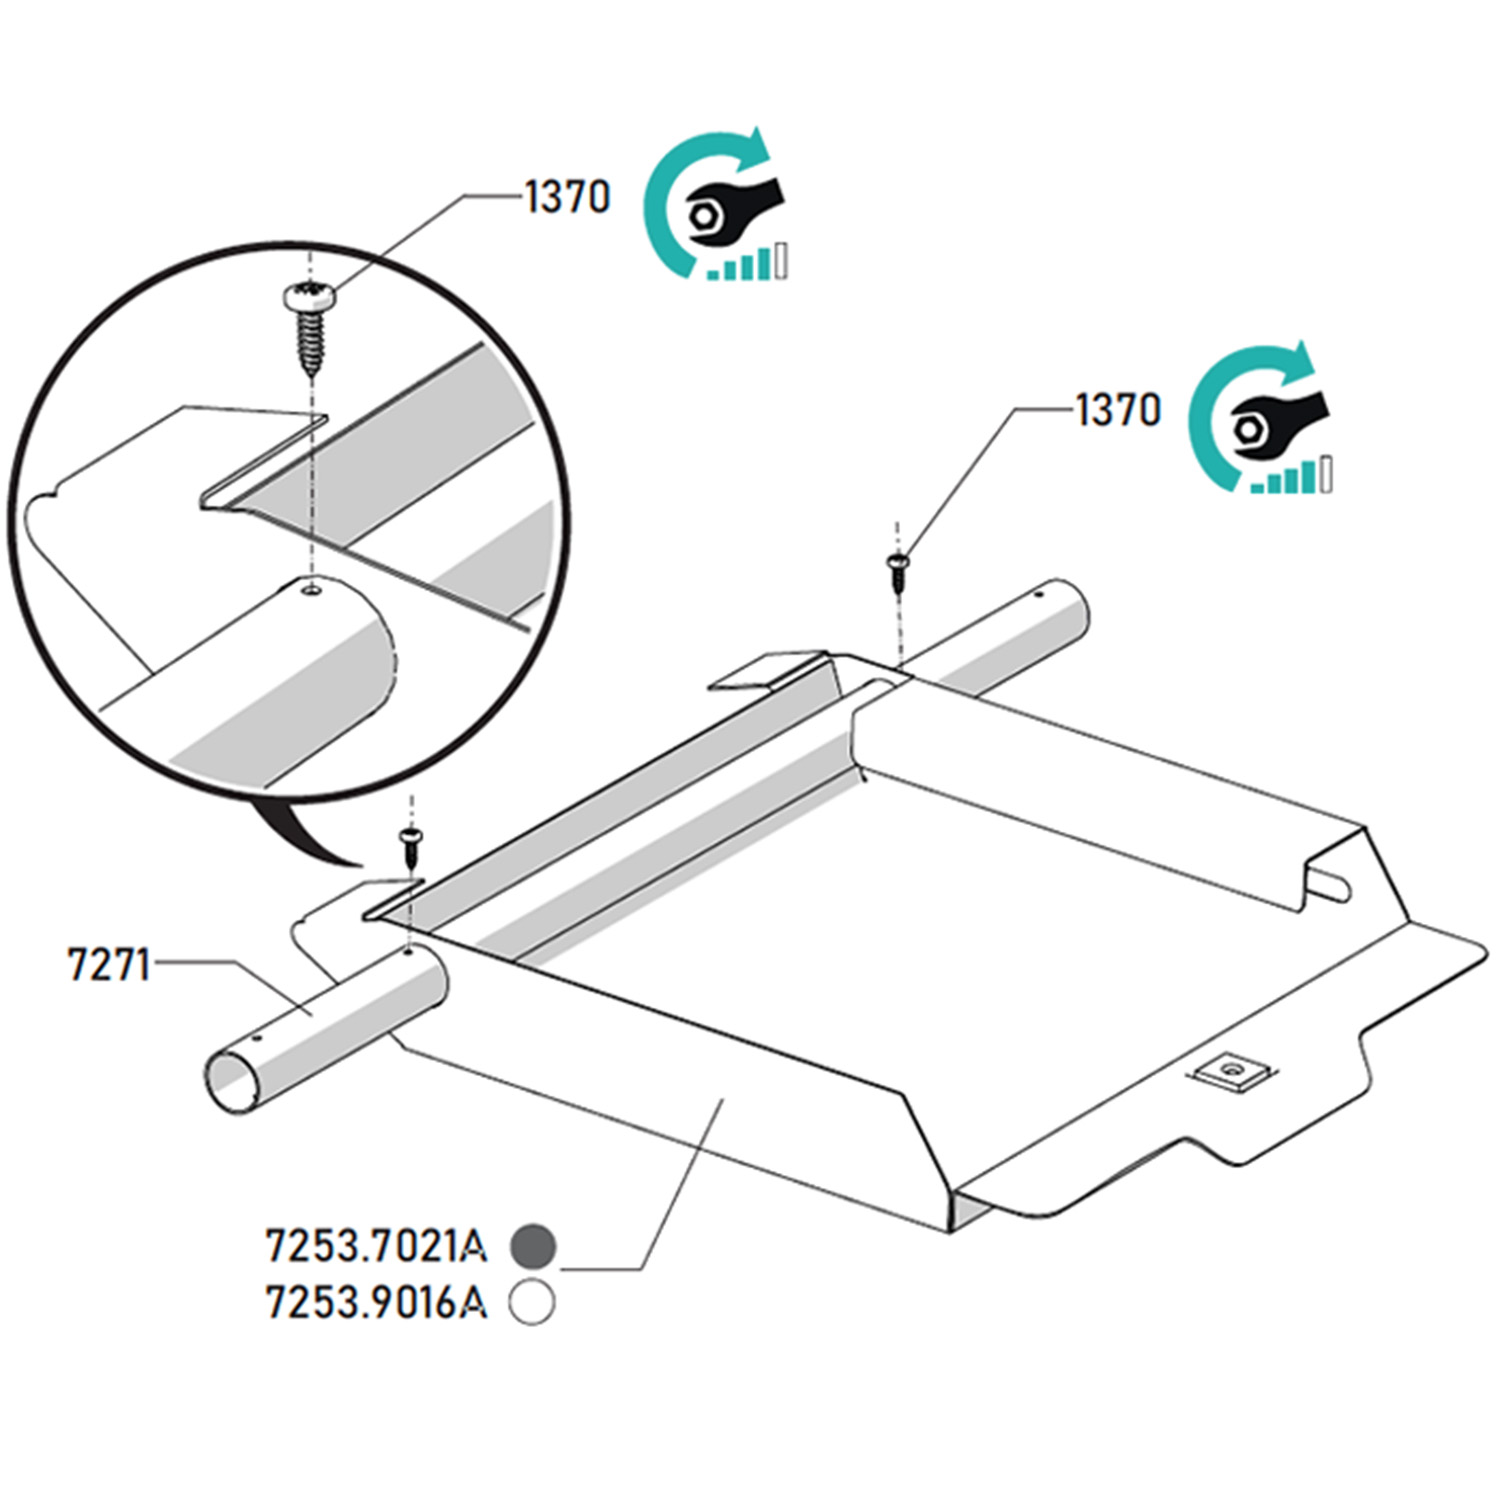
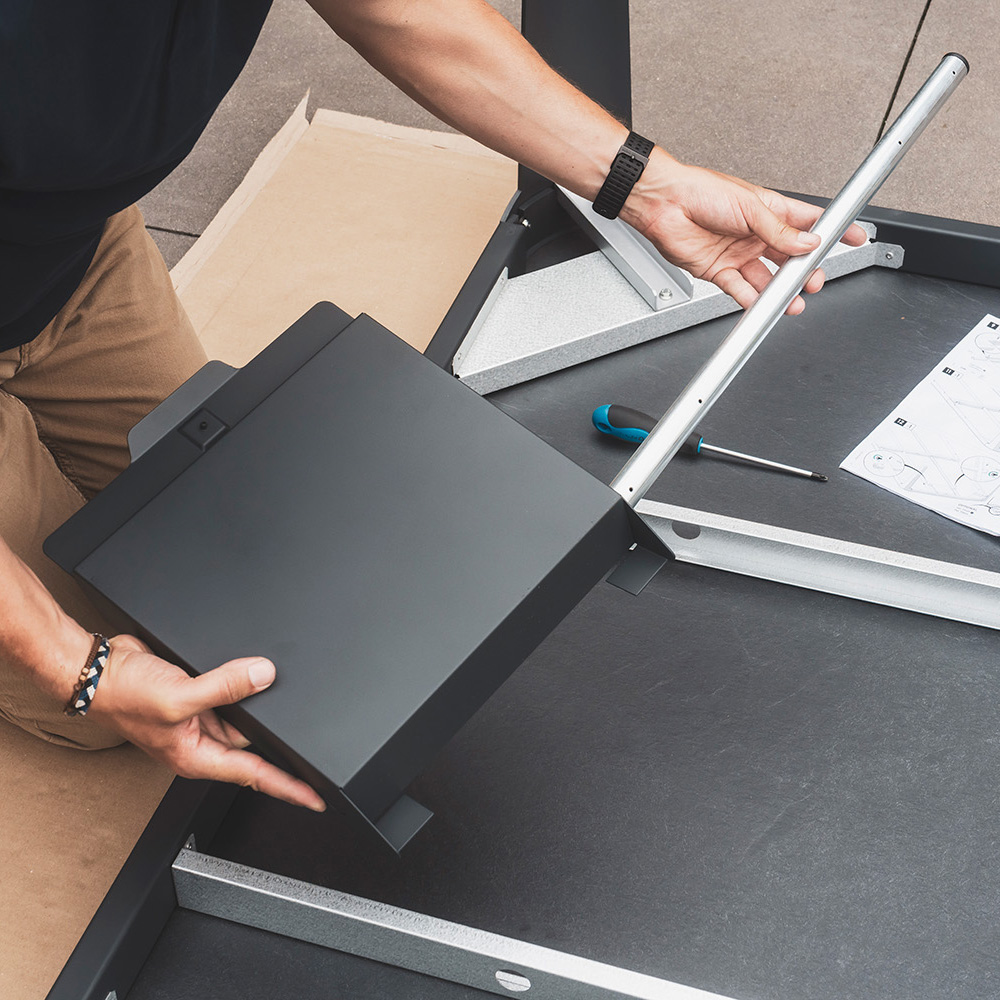
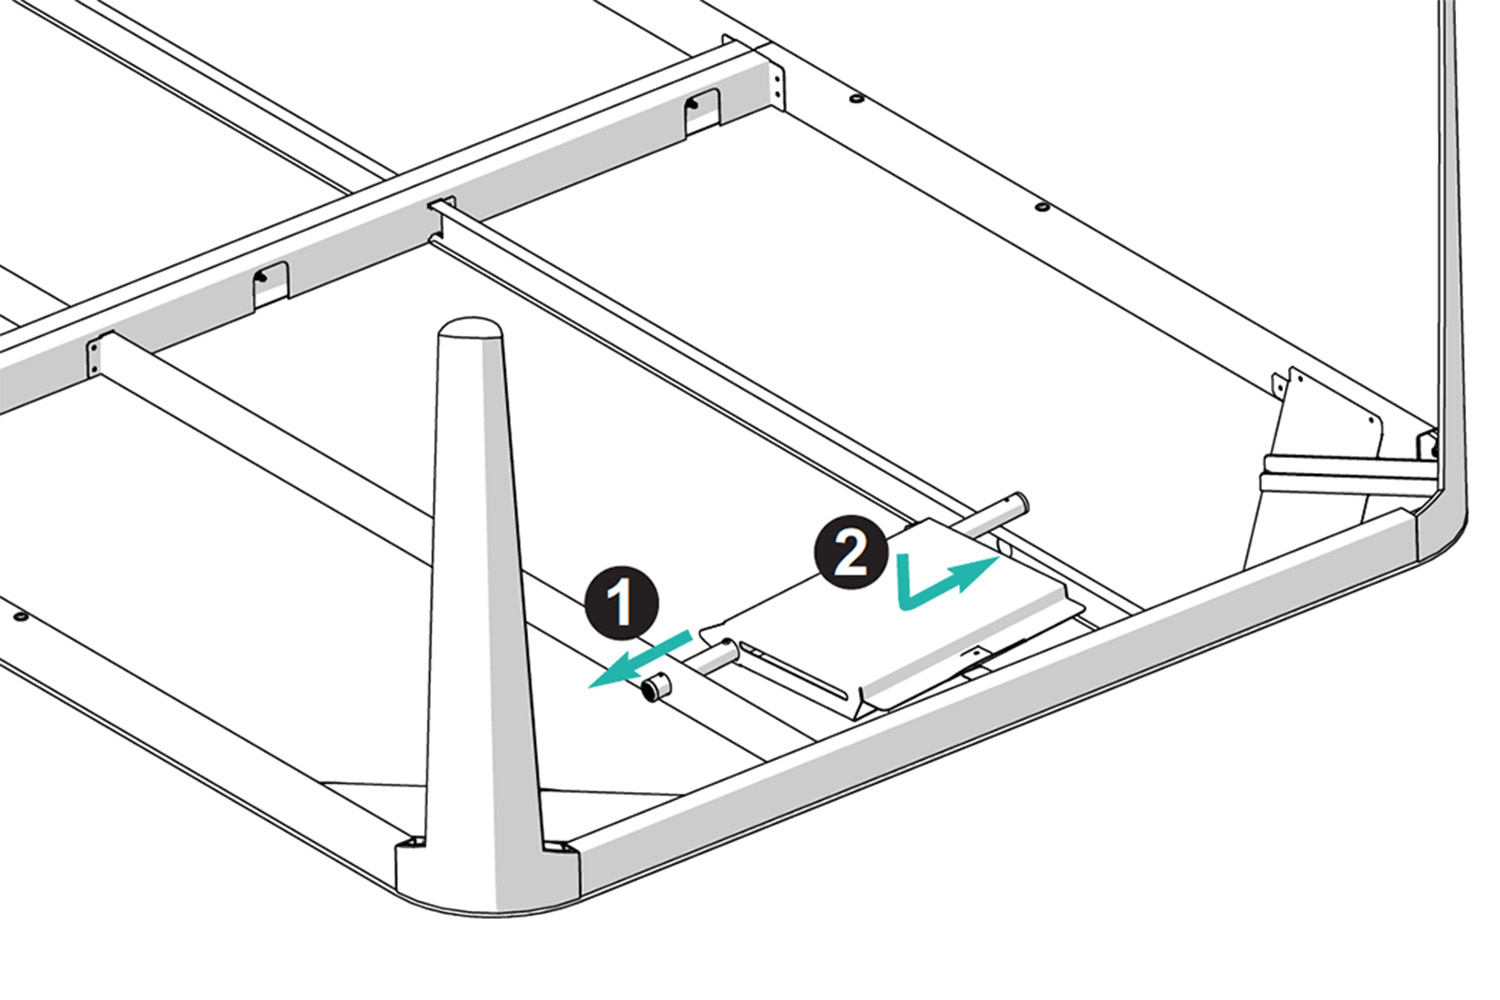
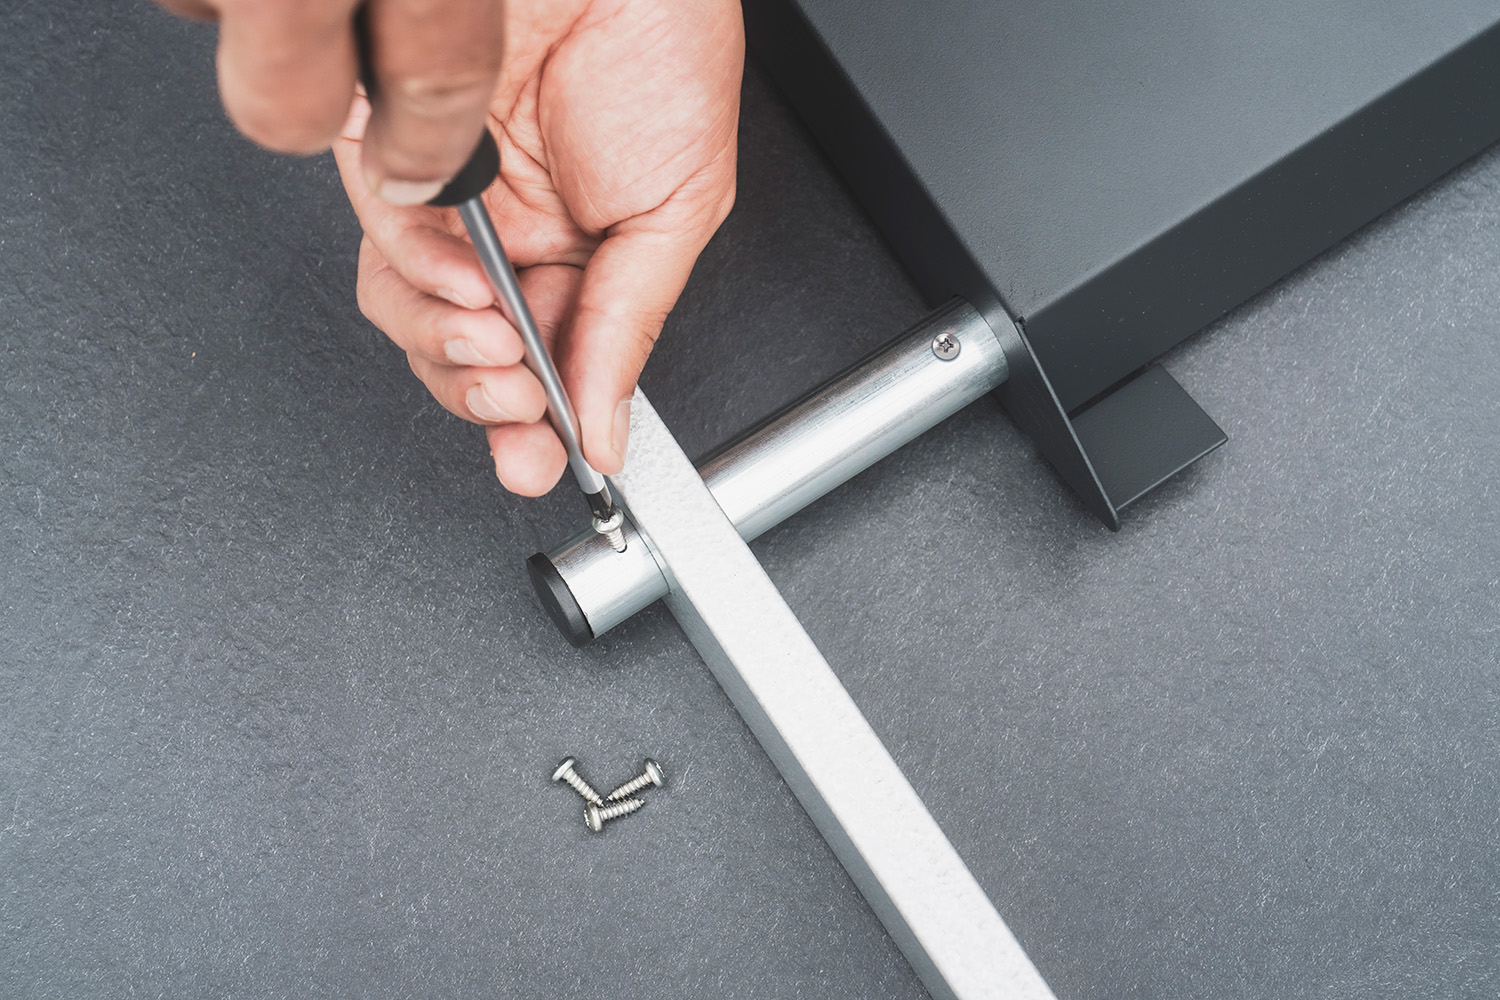
Insert the drawer crossmember (7271) into the drawer (7253), making sure that the holes protrude from both sides of the drawer. Then, securely screw the holes closest to the drawer using two screws (1370) to hold it in place. Some effort may be required.
Step 11
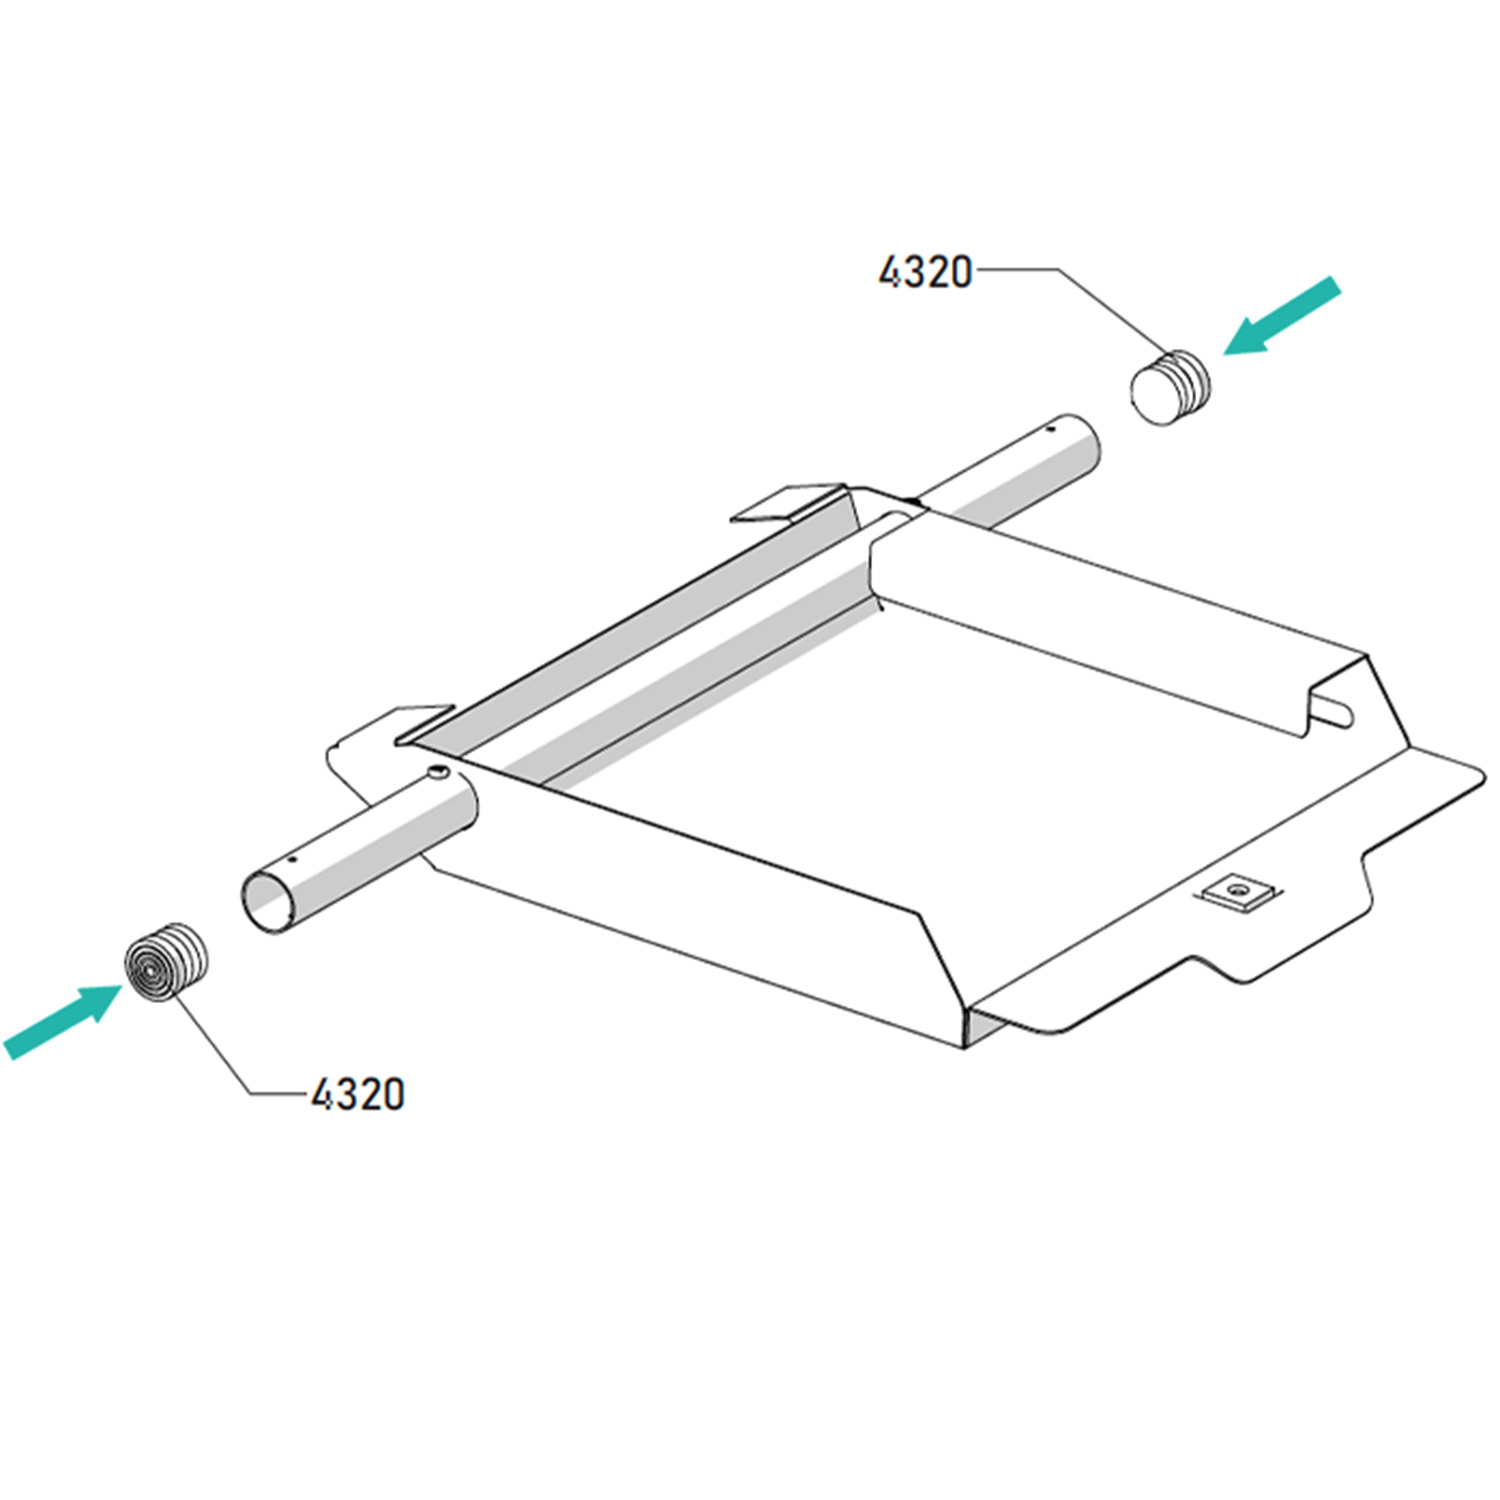
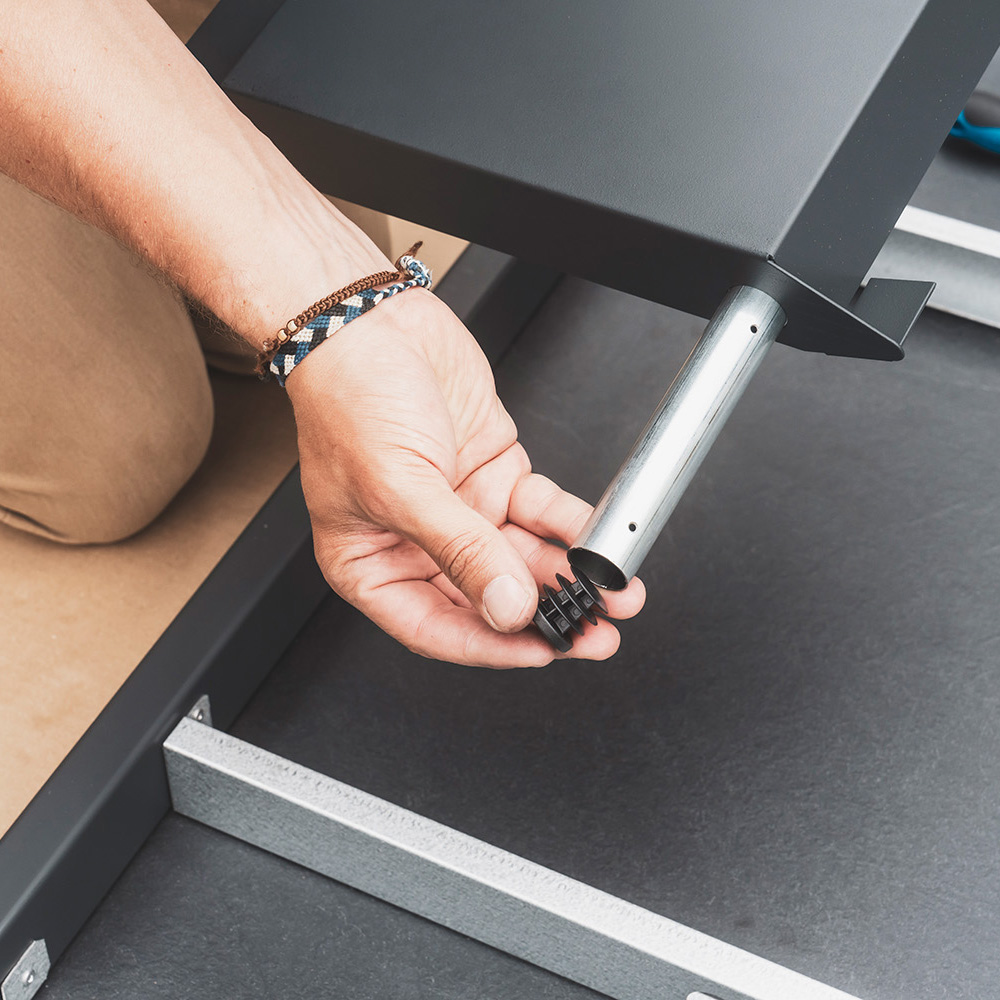
Place the caps (4320) on both ends of the drawer.
Step 12
Slide the crossmember and the drawer into the tabletop reinforcements, on either side of the table. The drawer magnet must rest on the previously installed magnet bracket.
Step 13
Screw the screws (1370) into the ends of the crossmember, on the outside of the reinforcement, to hold the drawer in place. Some effort may be required.
Option: repeat from step 9 if you have opted for a second optional drawer.
Step 14
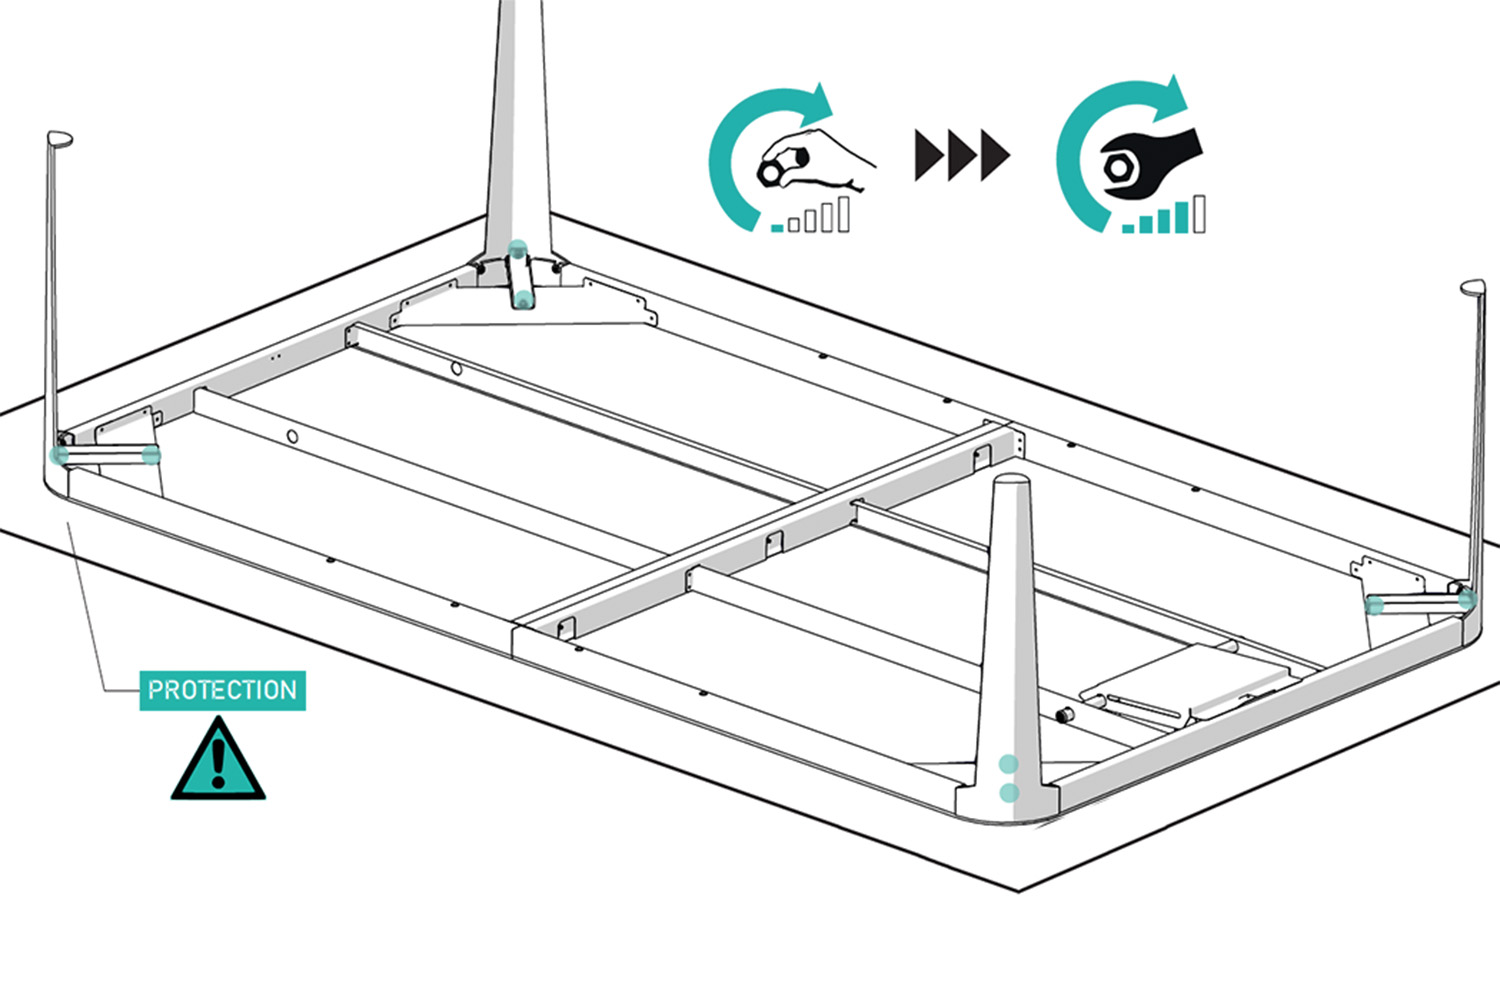
Securely tighten the nuts and screws on the legs.
Step 15
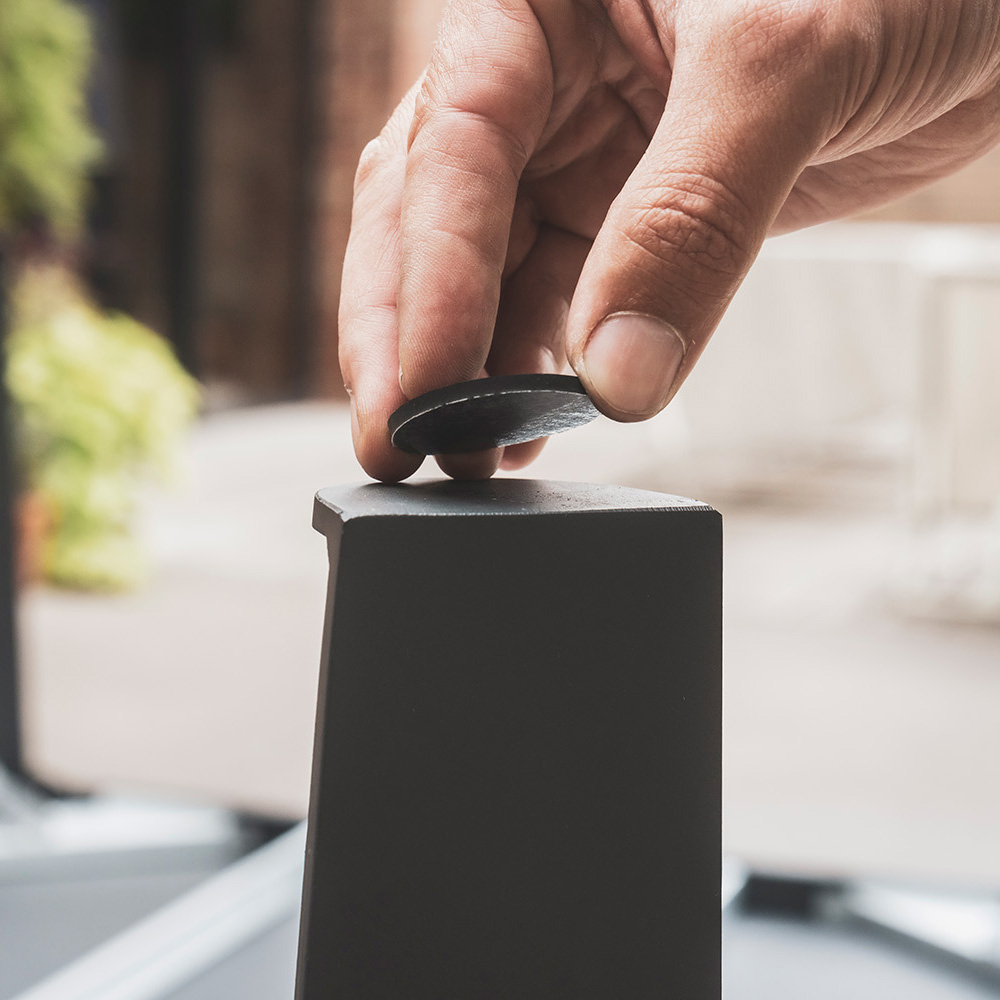
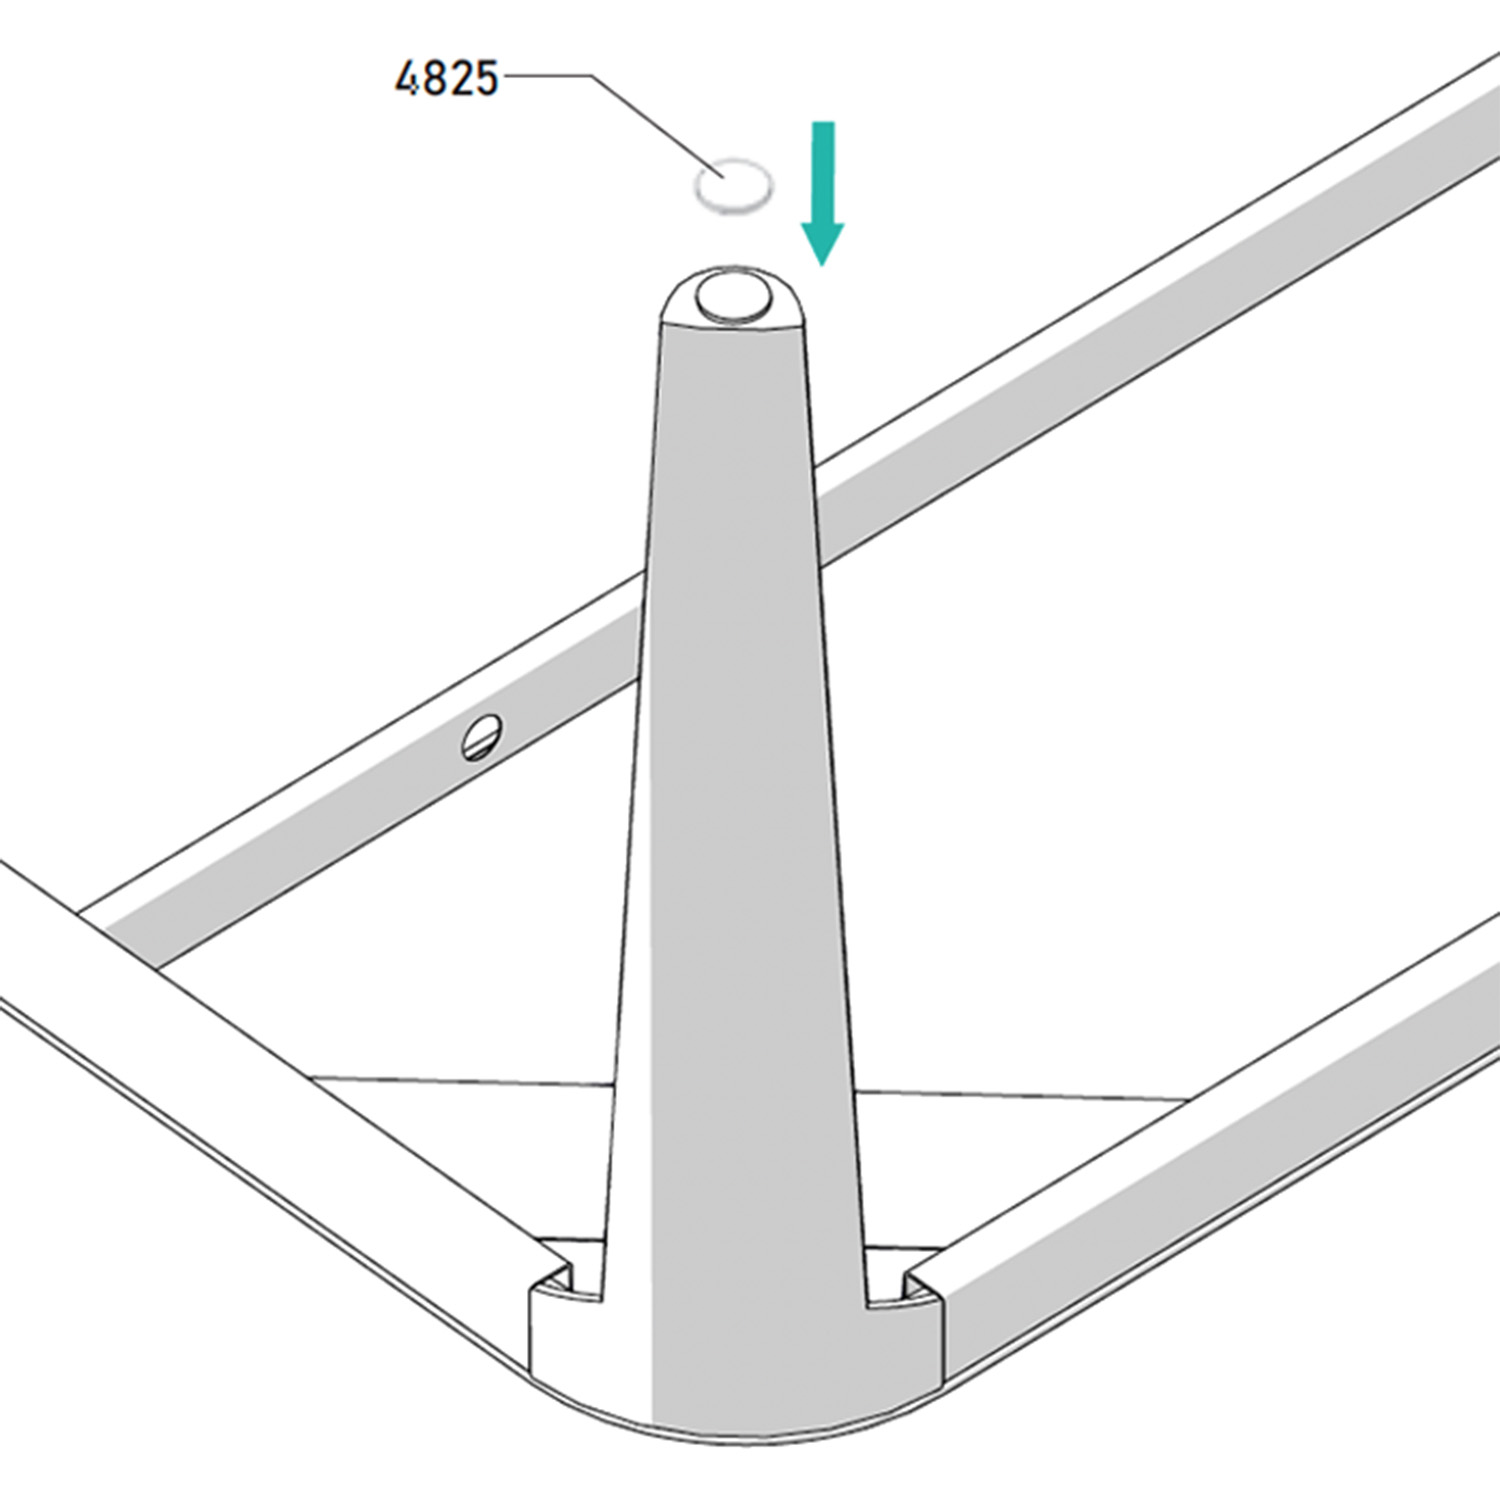
Stick the pads (4825) under each leg of the table.
Step 16
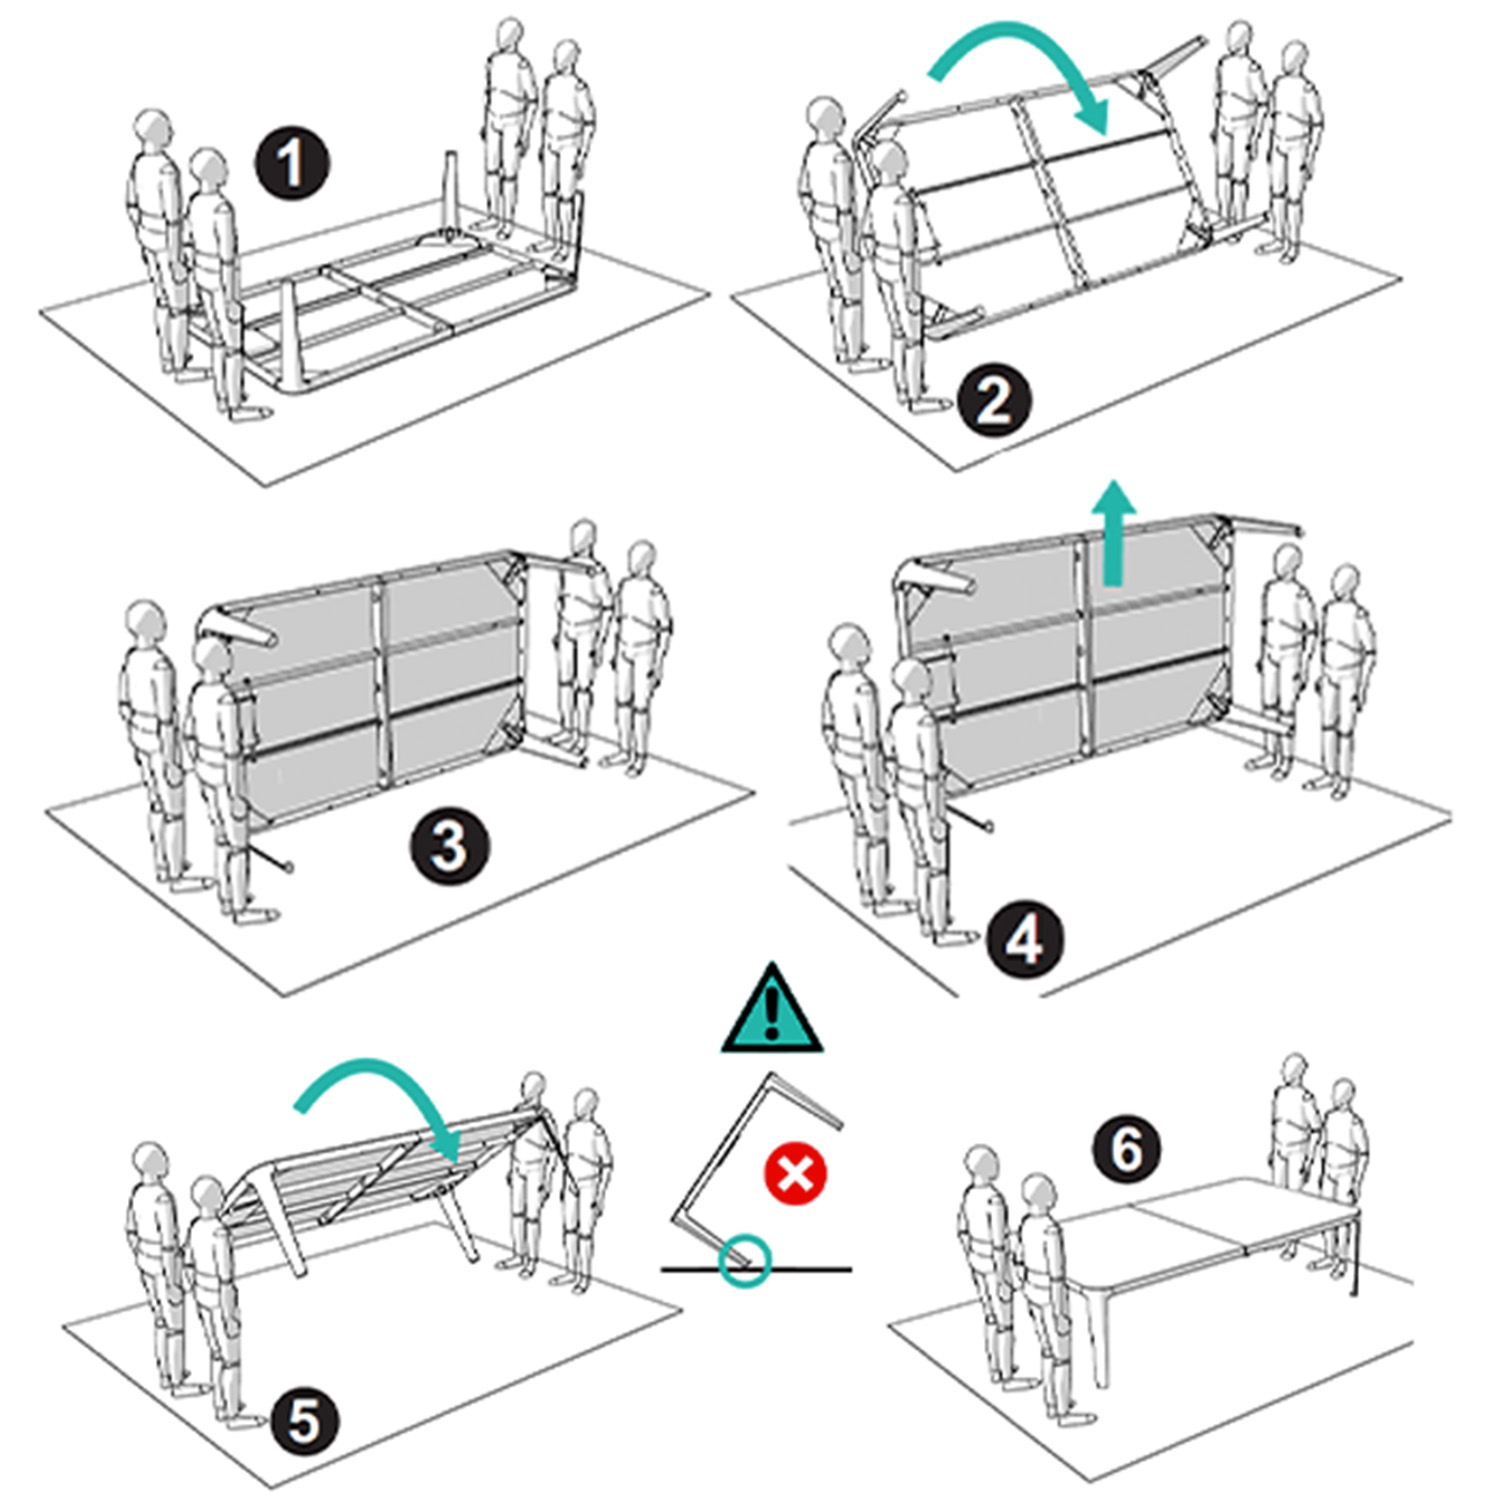
Turn the table over. Four people may be required for this operation.
Please note, do not let the table rest on only two legs during this step, as this may damage the legs.
Step 17
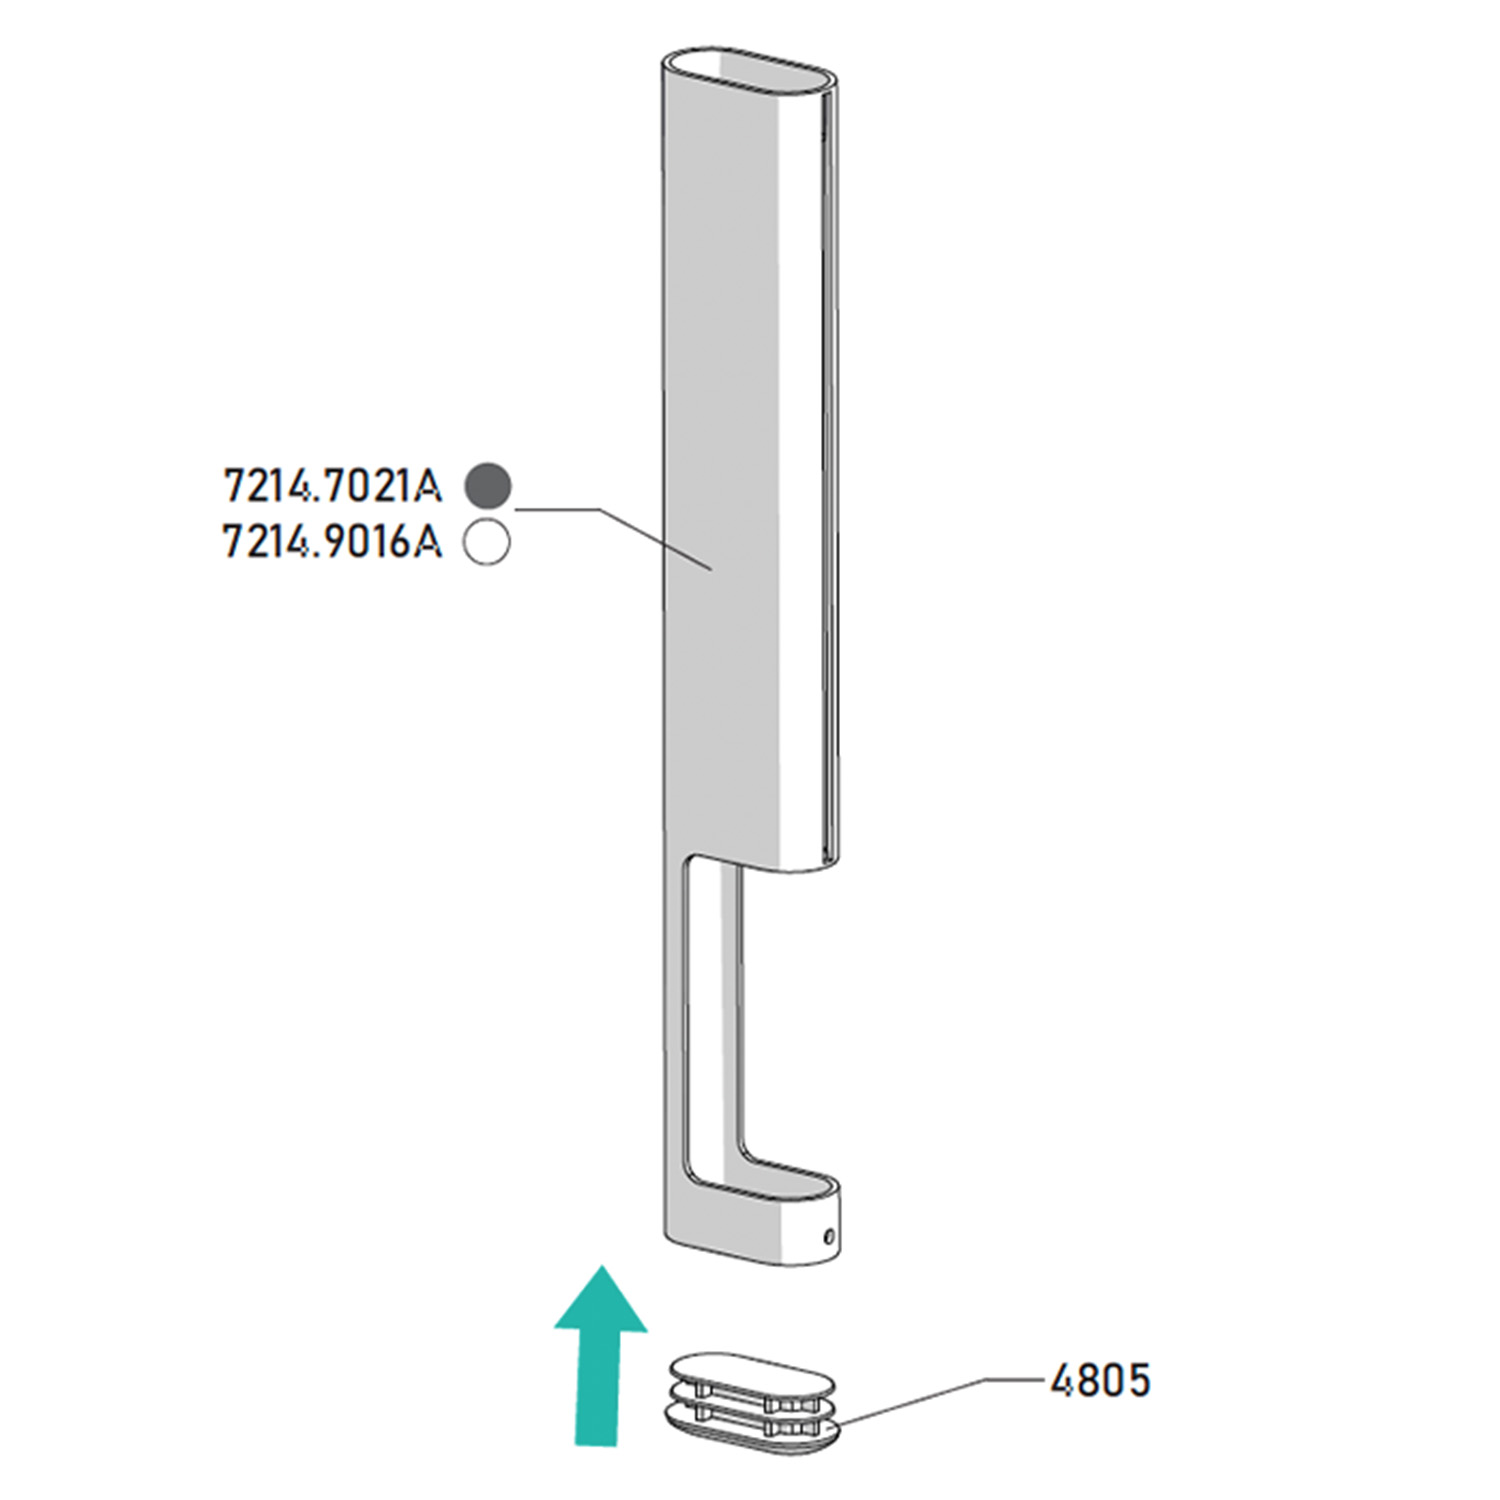
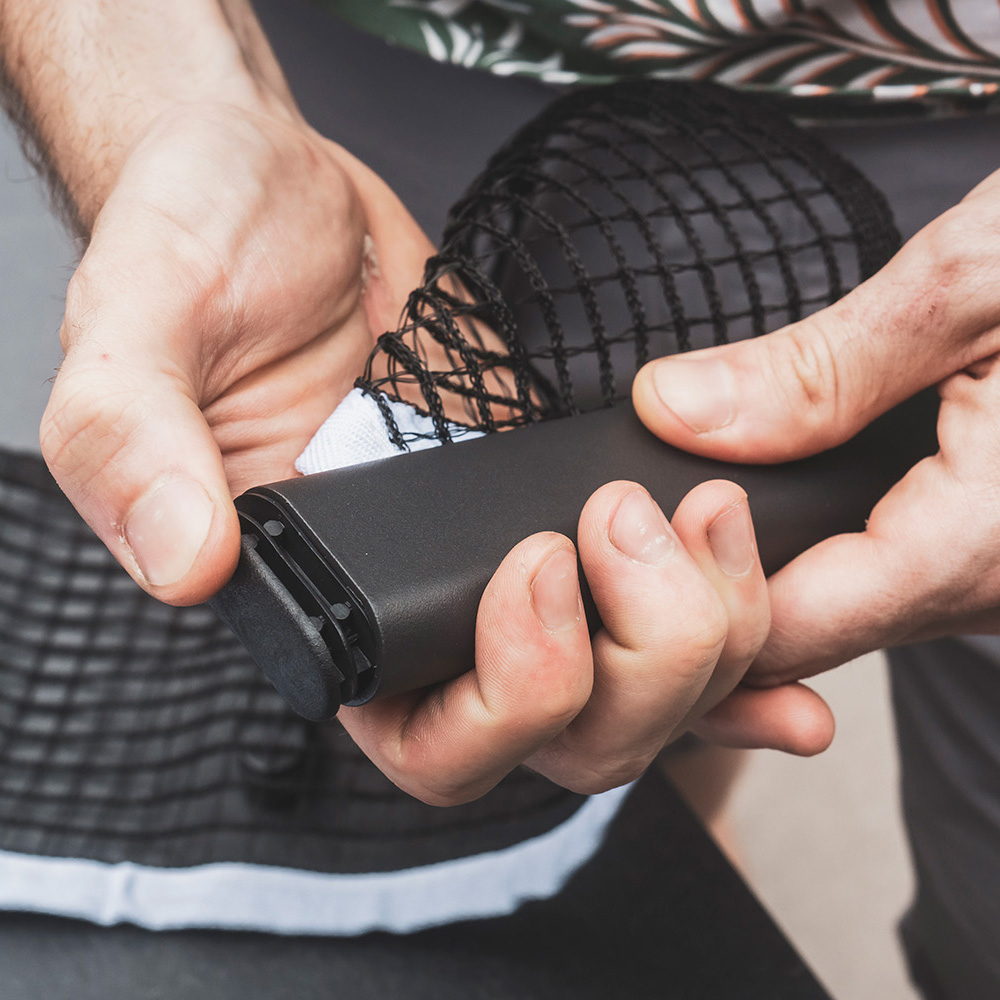
Place a cap (4805) at the bottom of the net post (7214).
Step 18
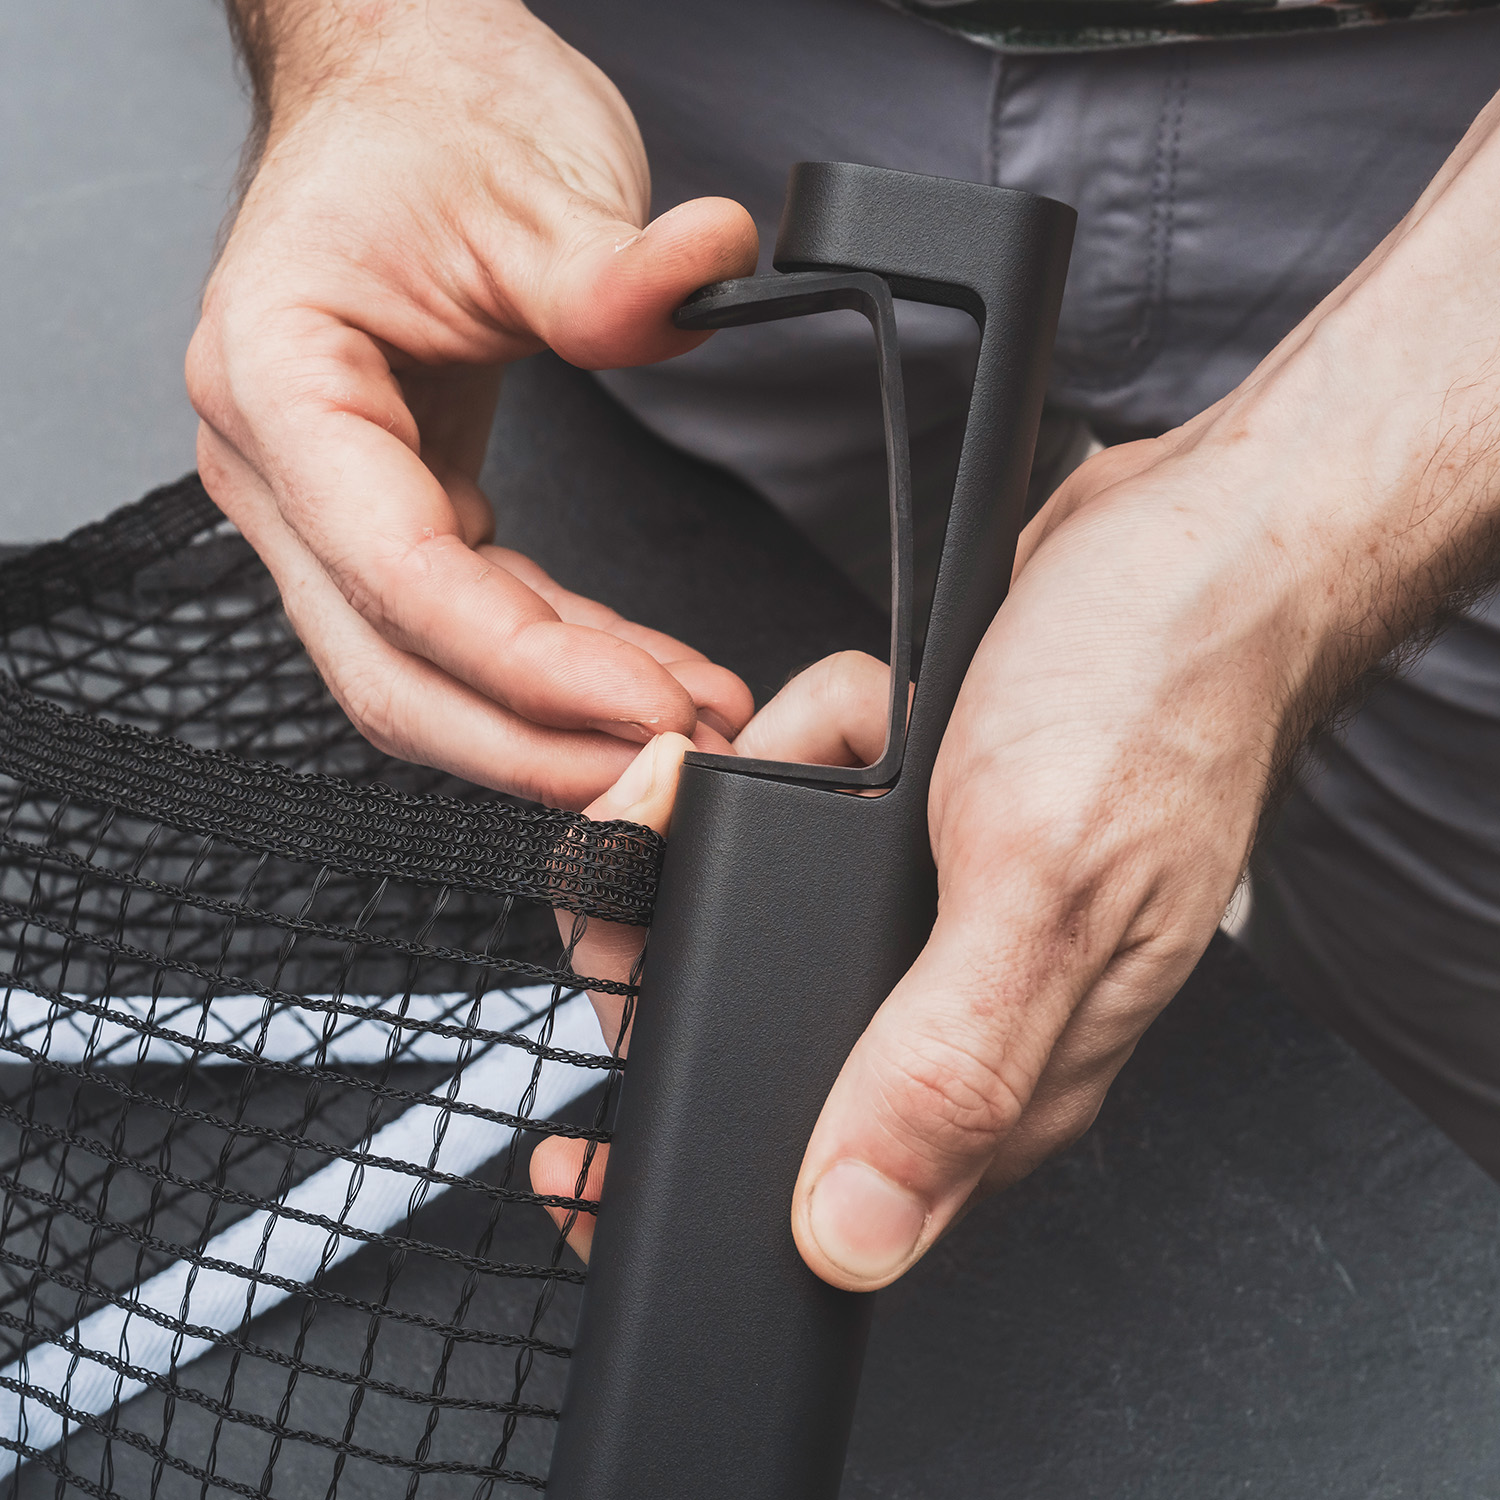
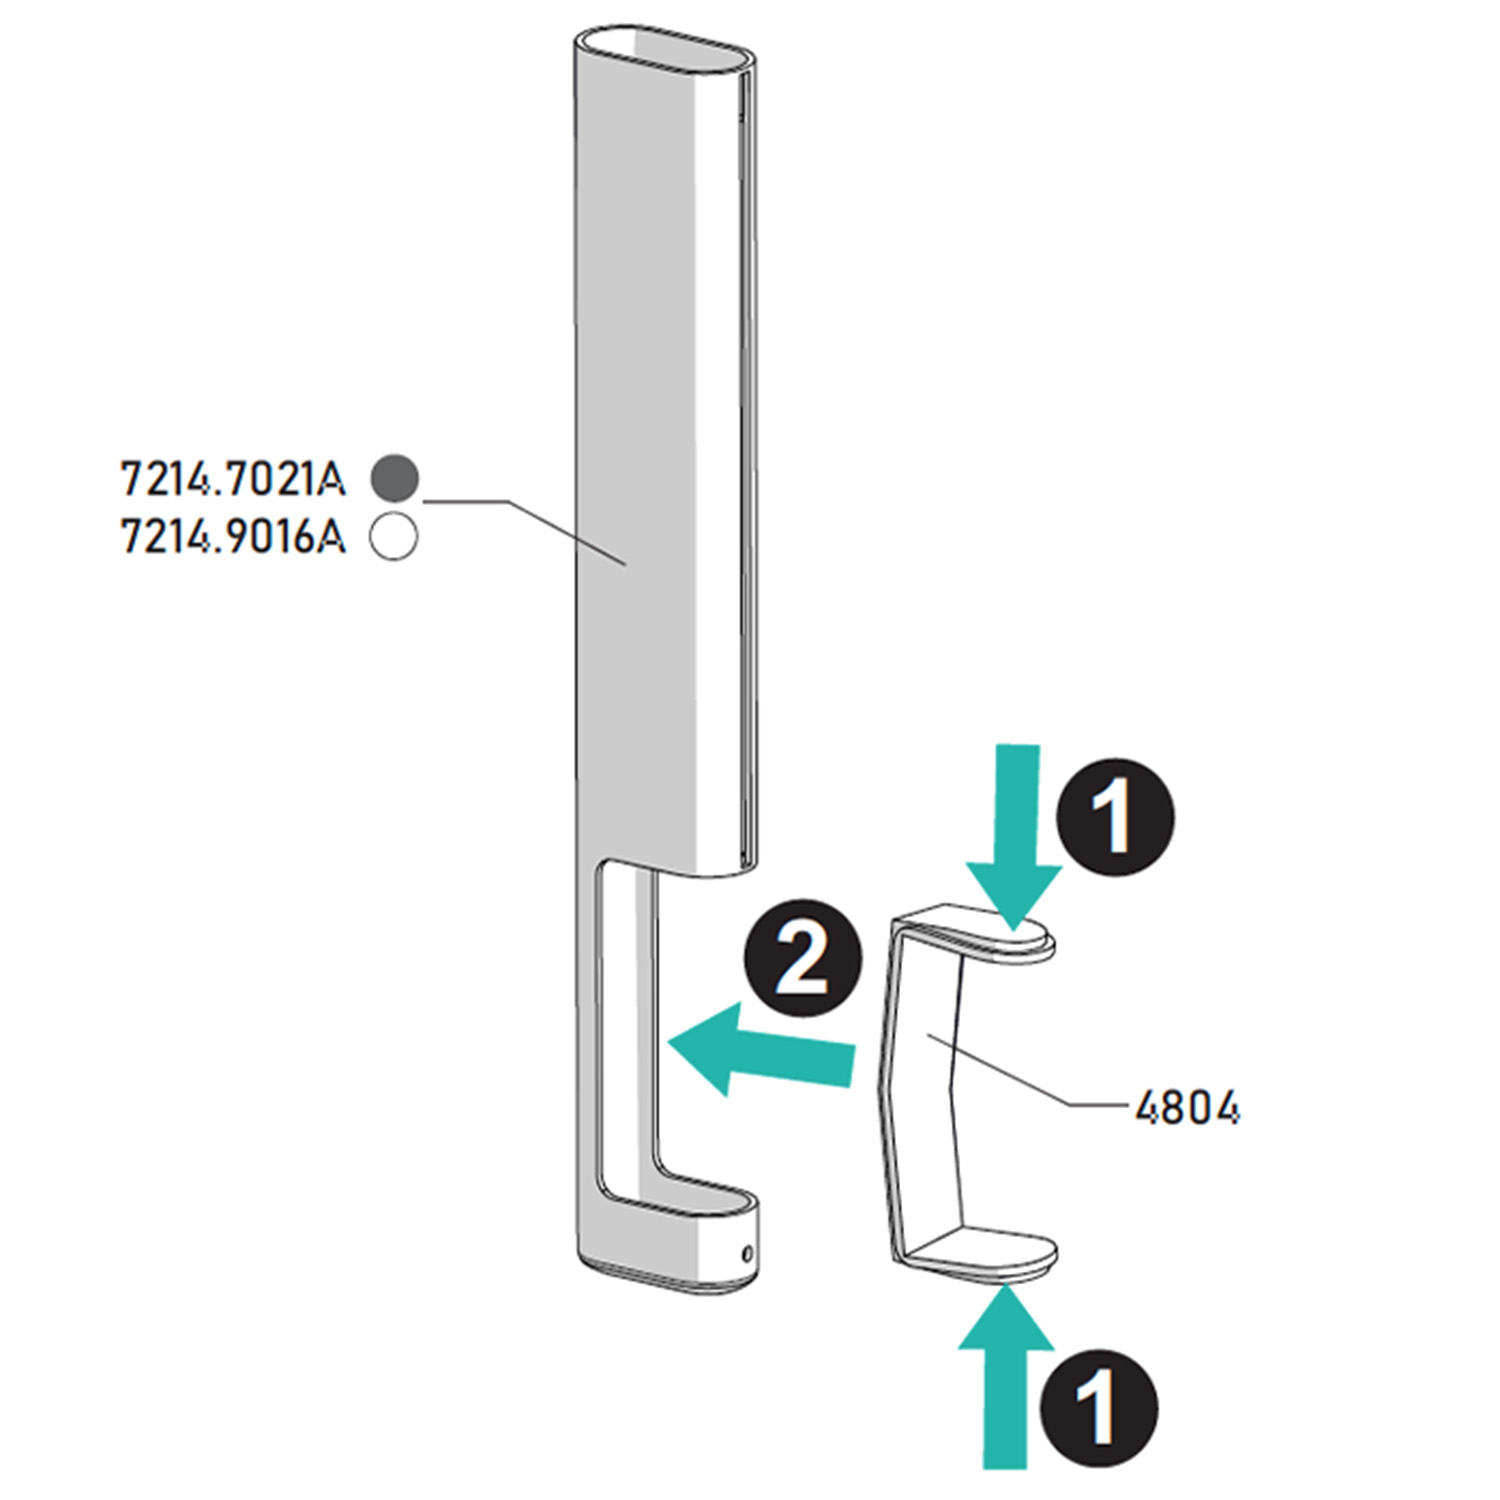
Insert the post spacer (4804) into the post by pinching it.
Step 19
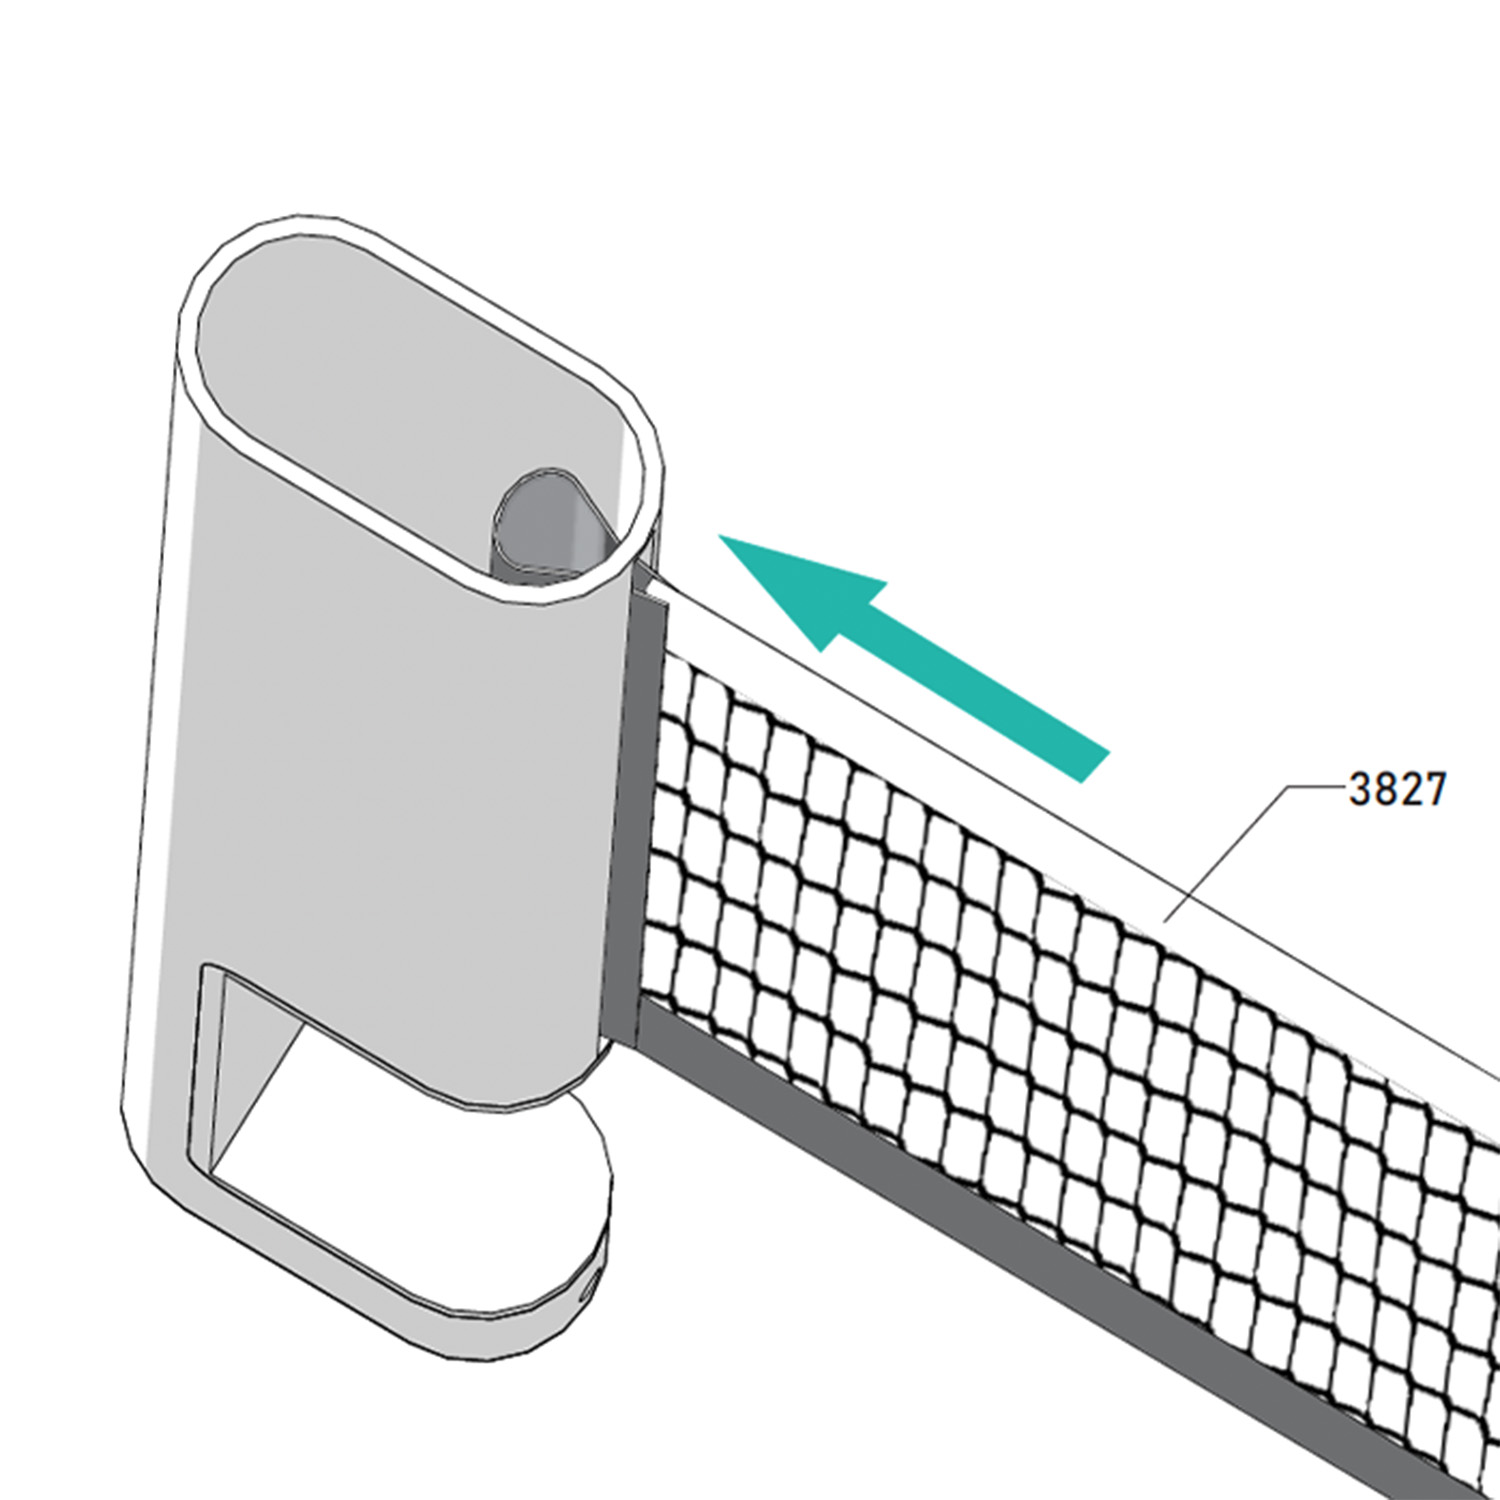
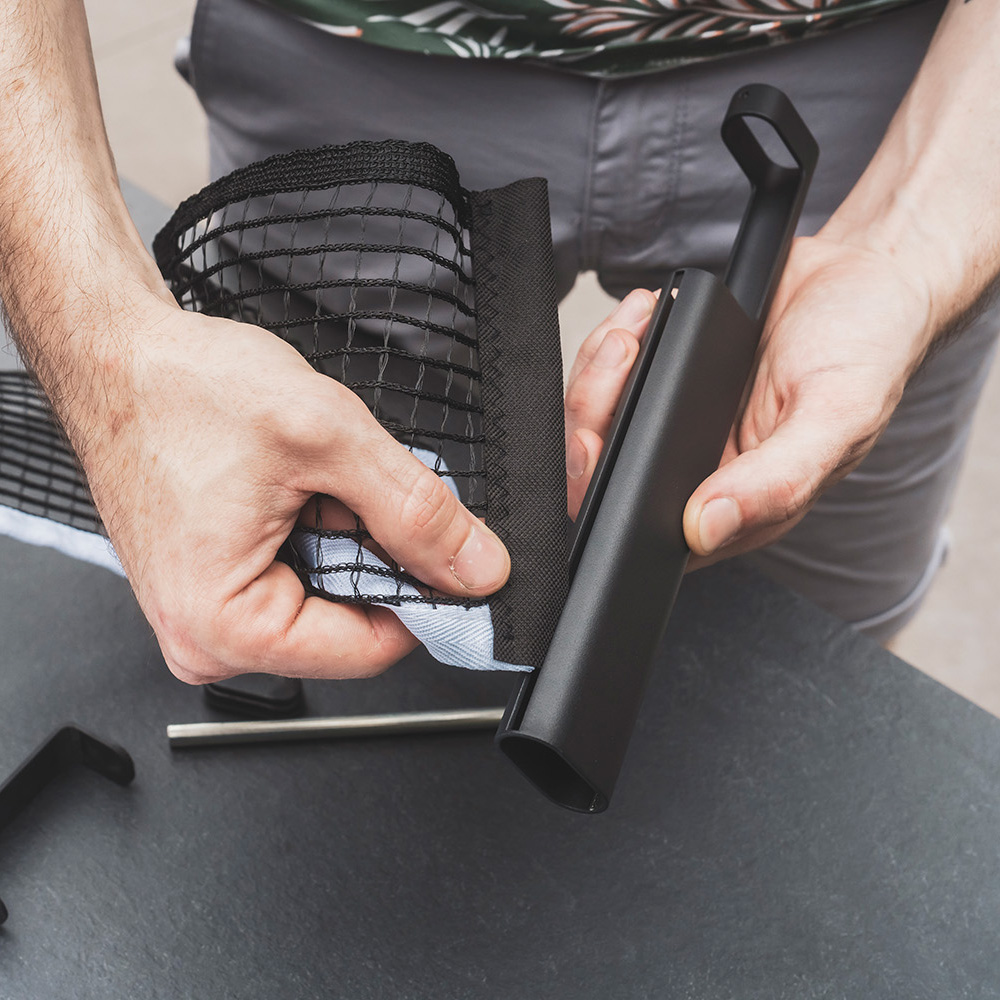
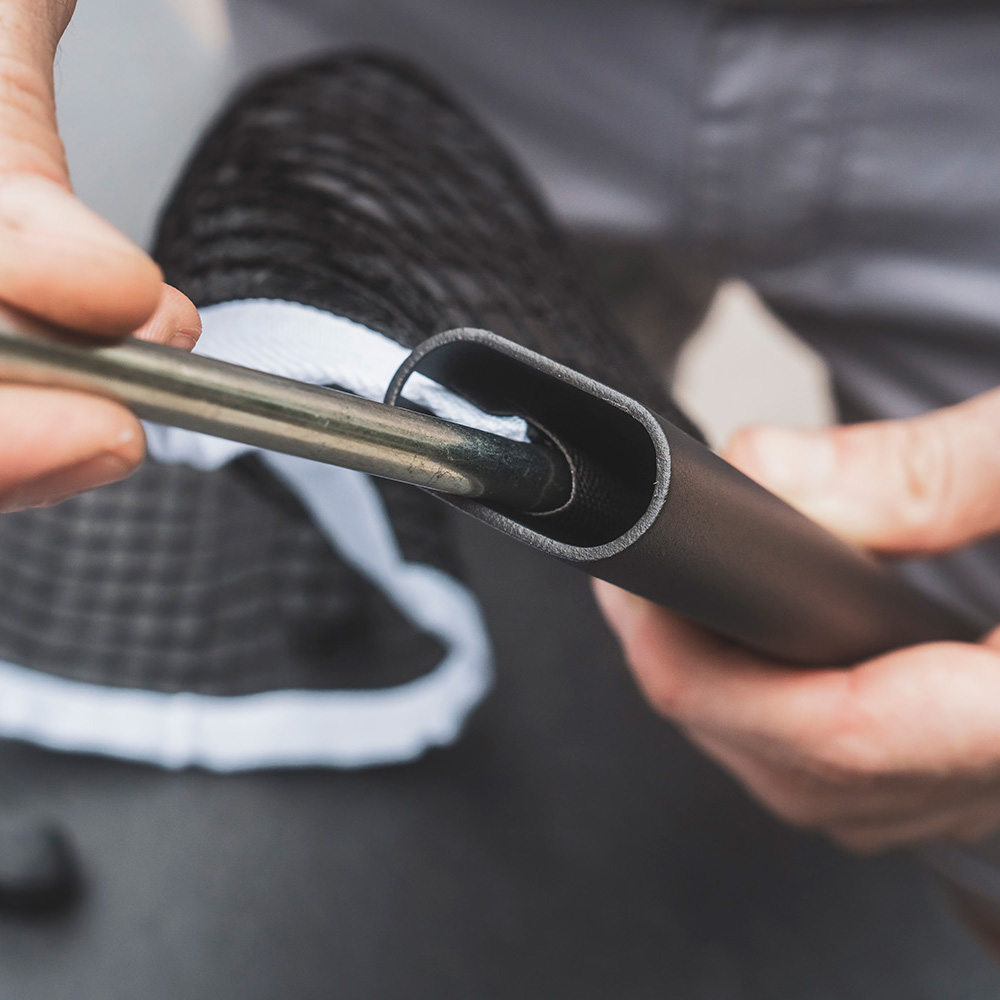
Insert the sleeve (black part of the net) into the opening of the post.
Step 20
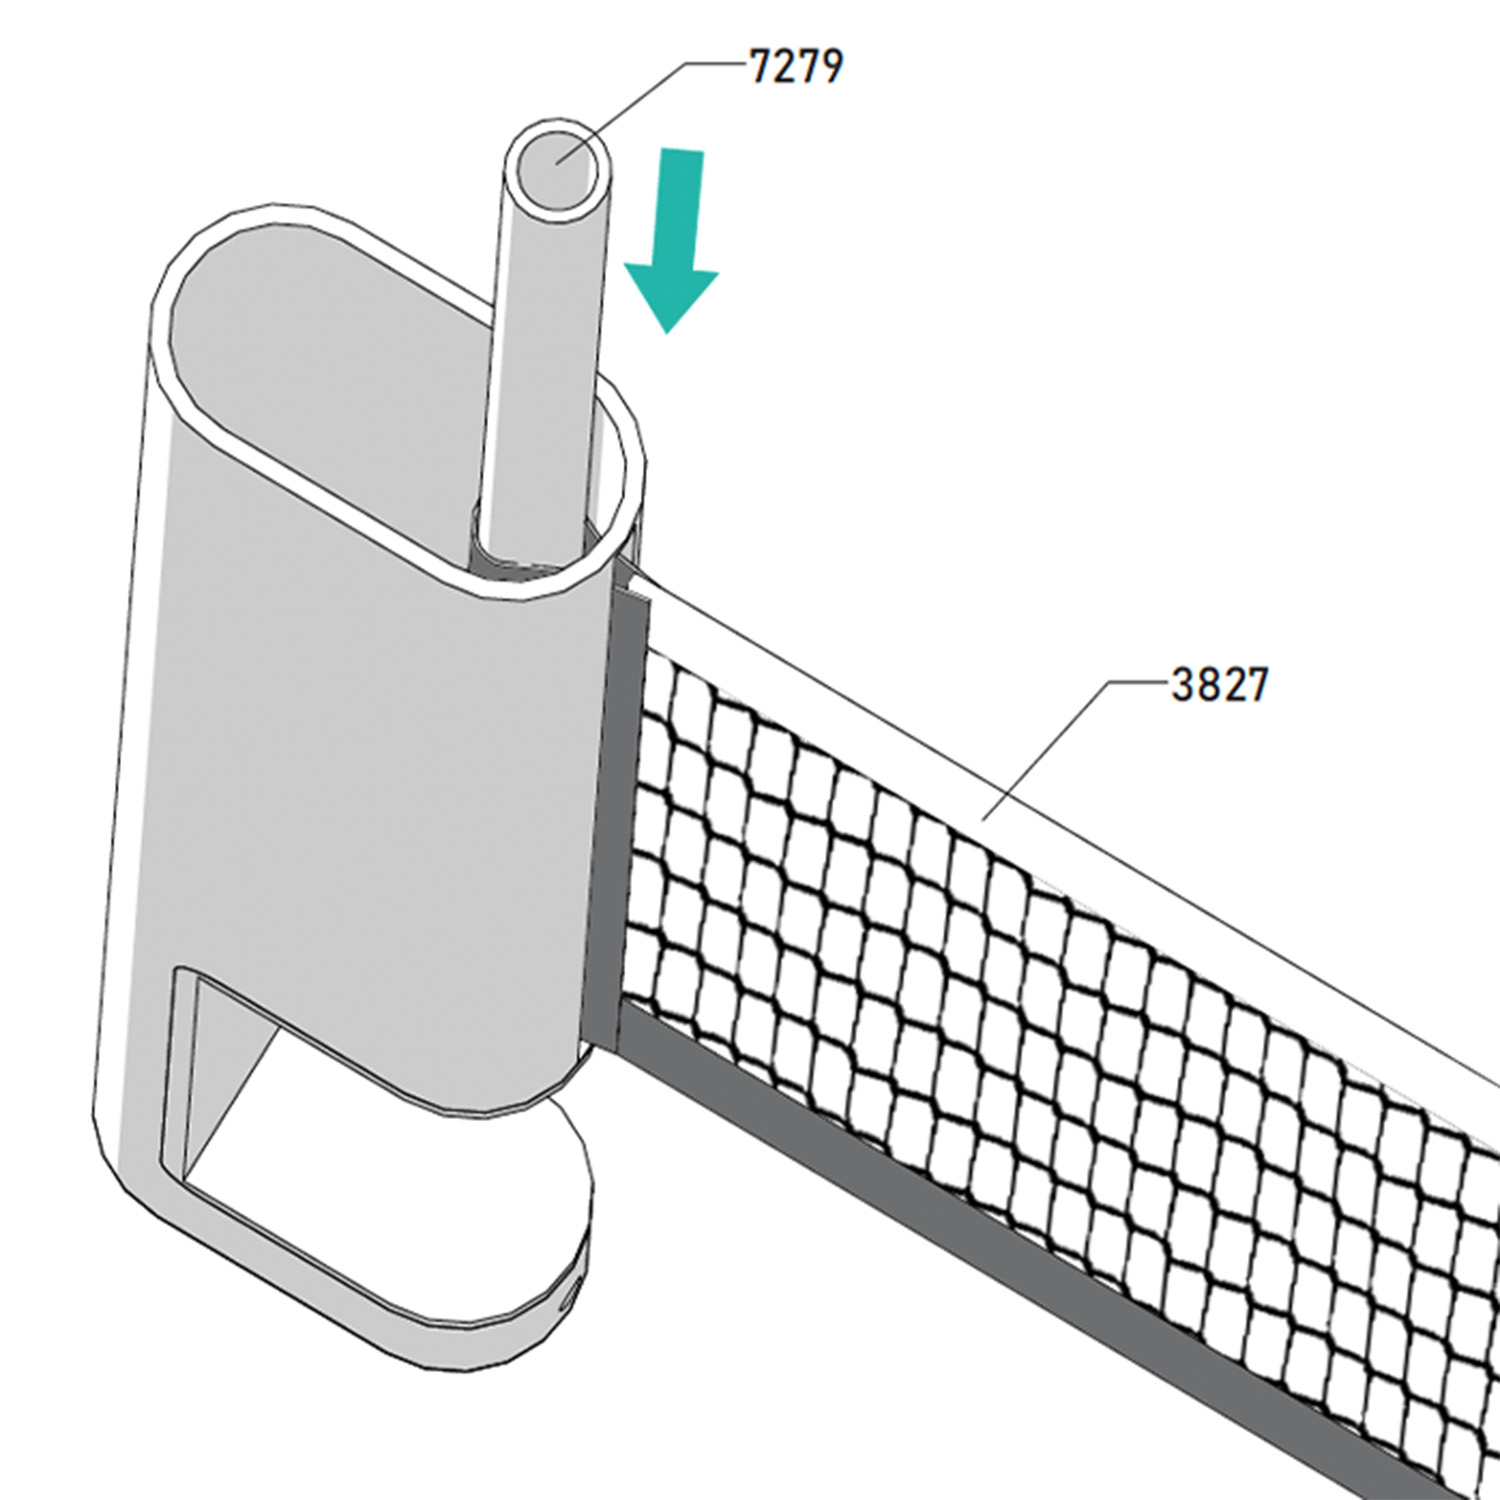
Insert the rod (7279) into the net sleeve.
Step 21
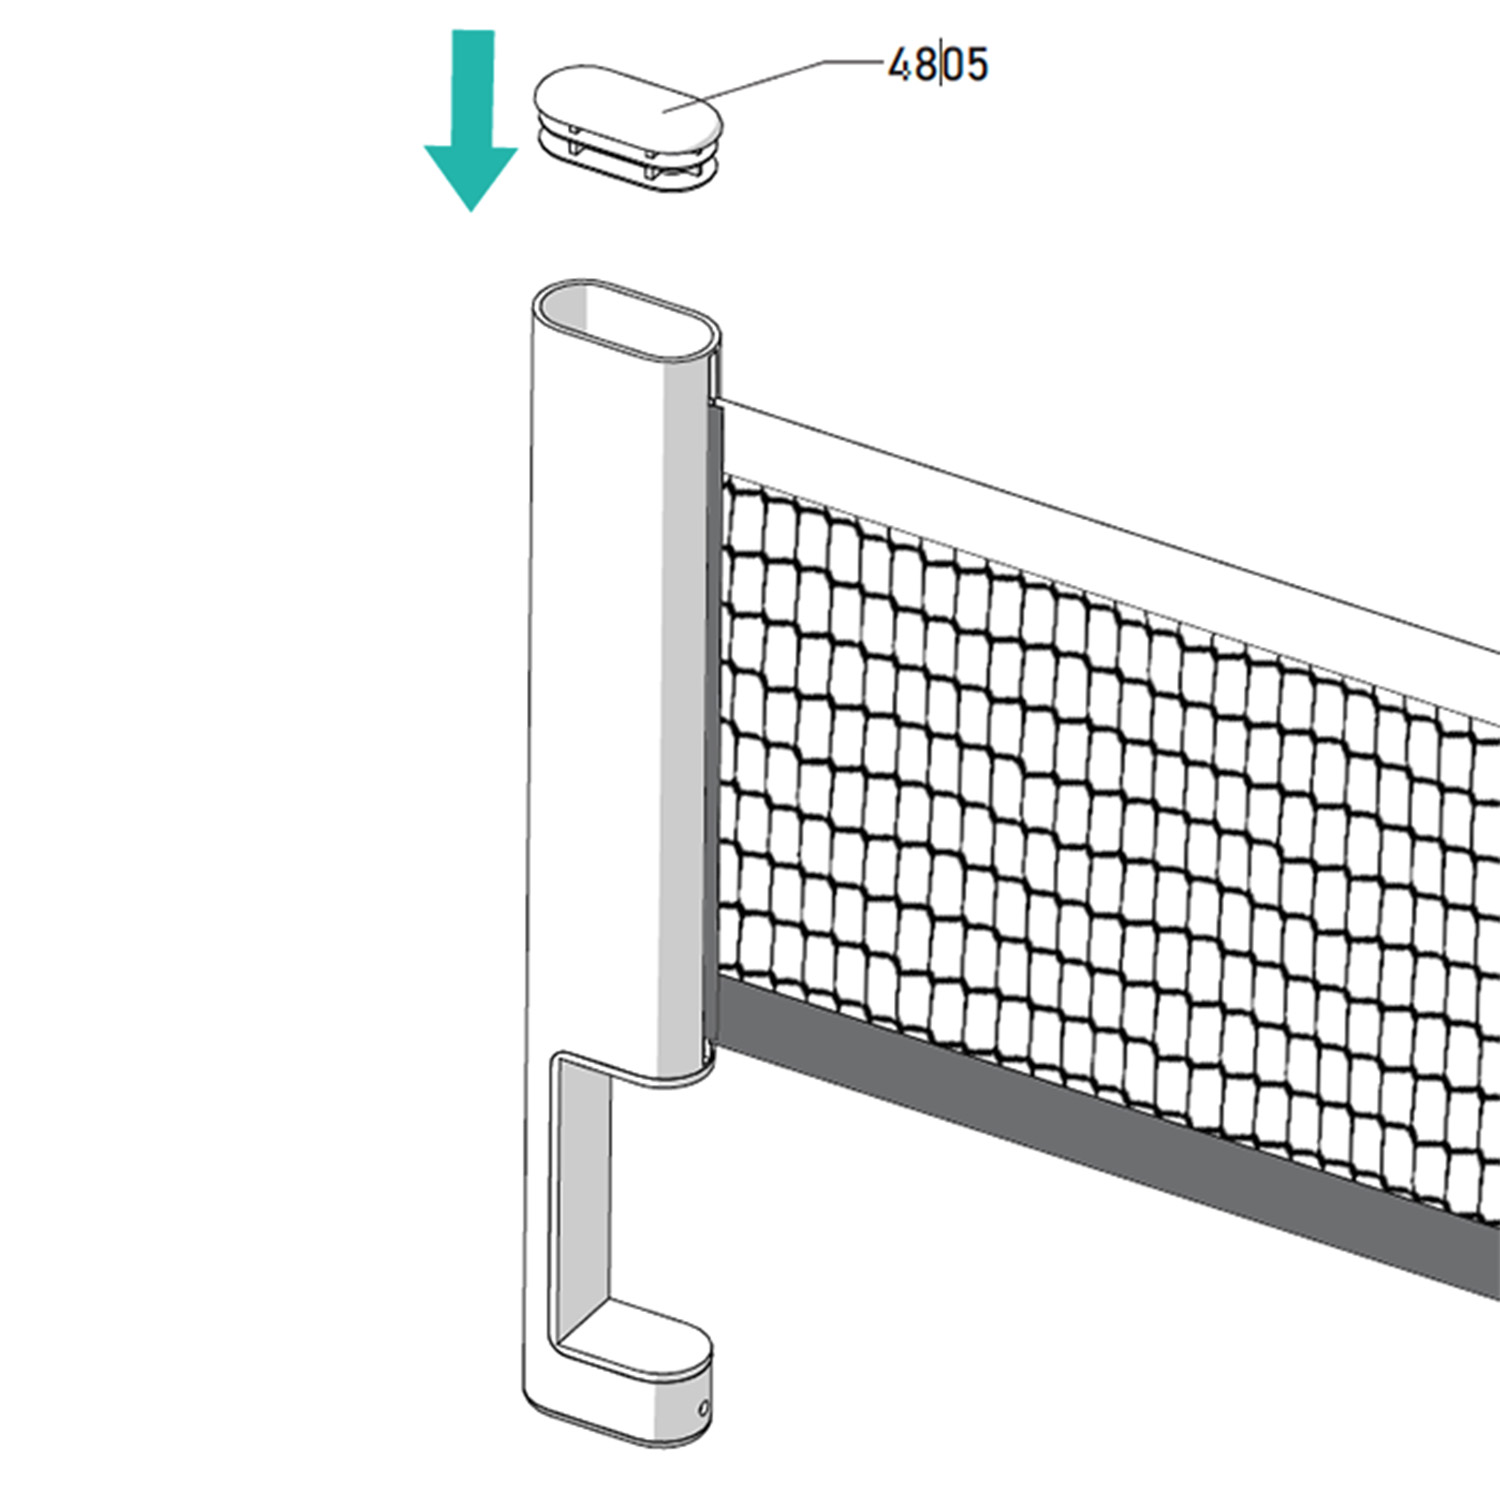
Place the second cap (4805) at the top of the net post.
Step 22
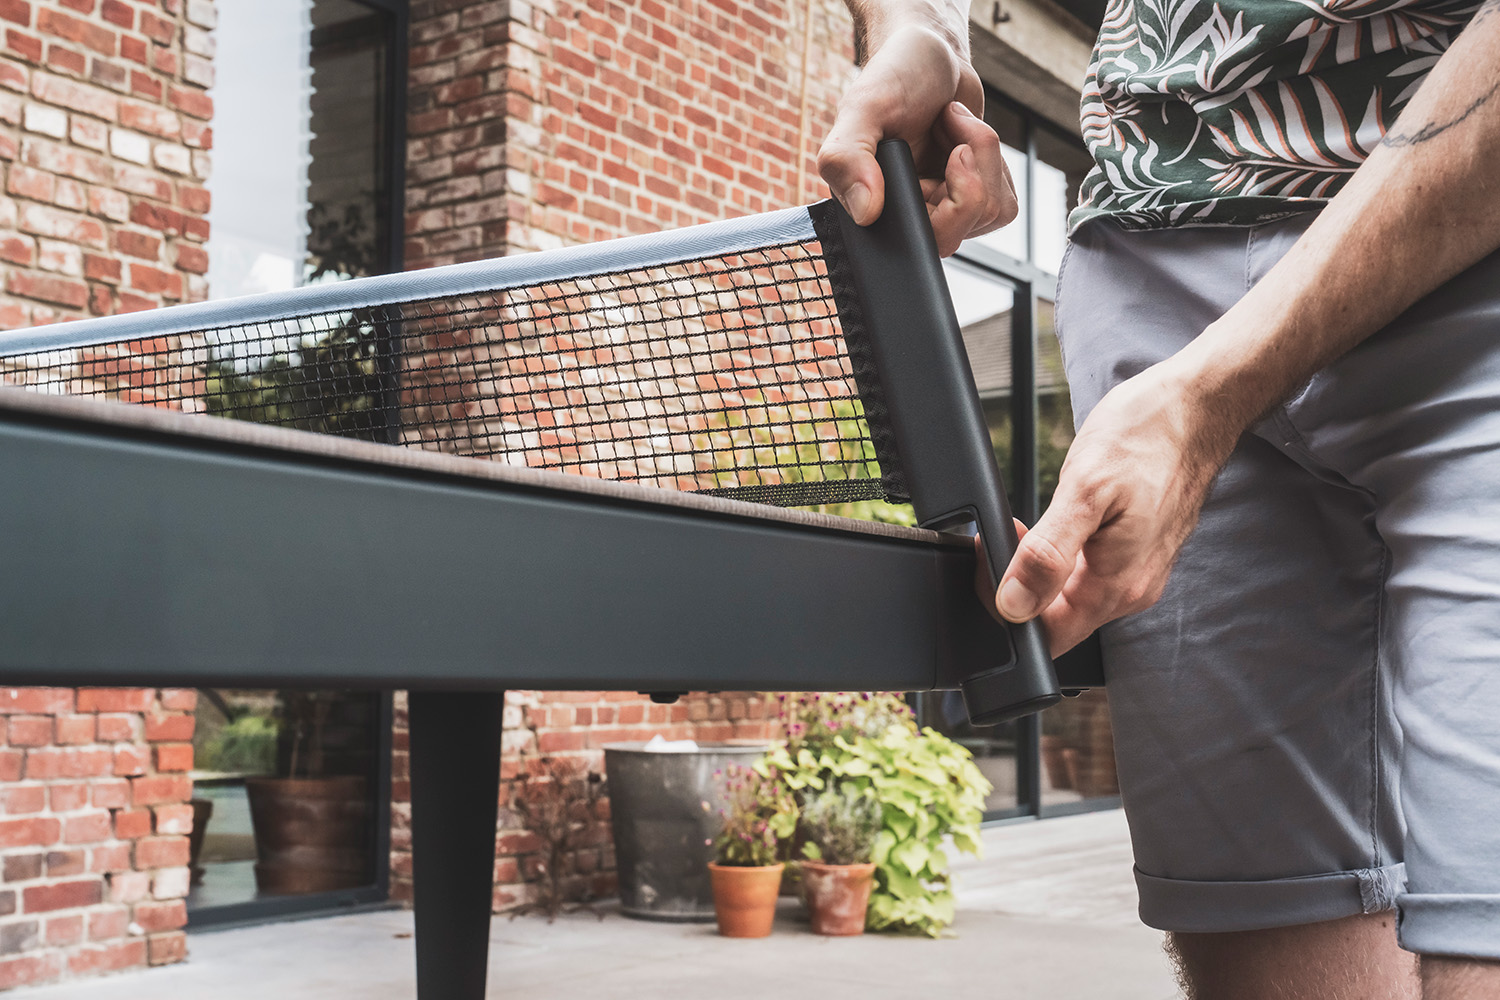
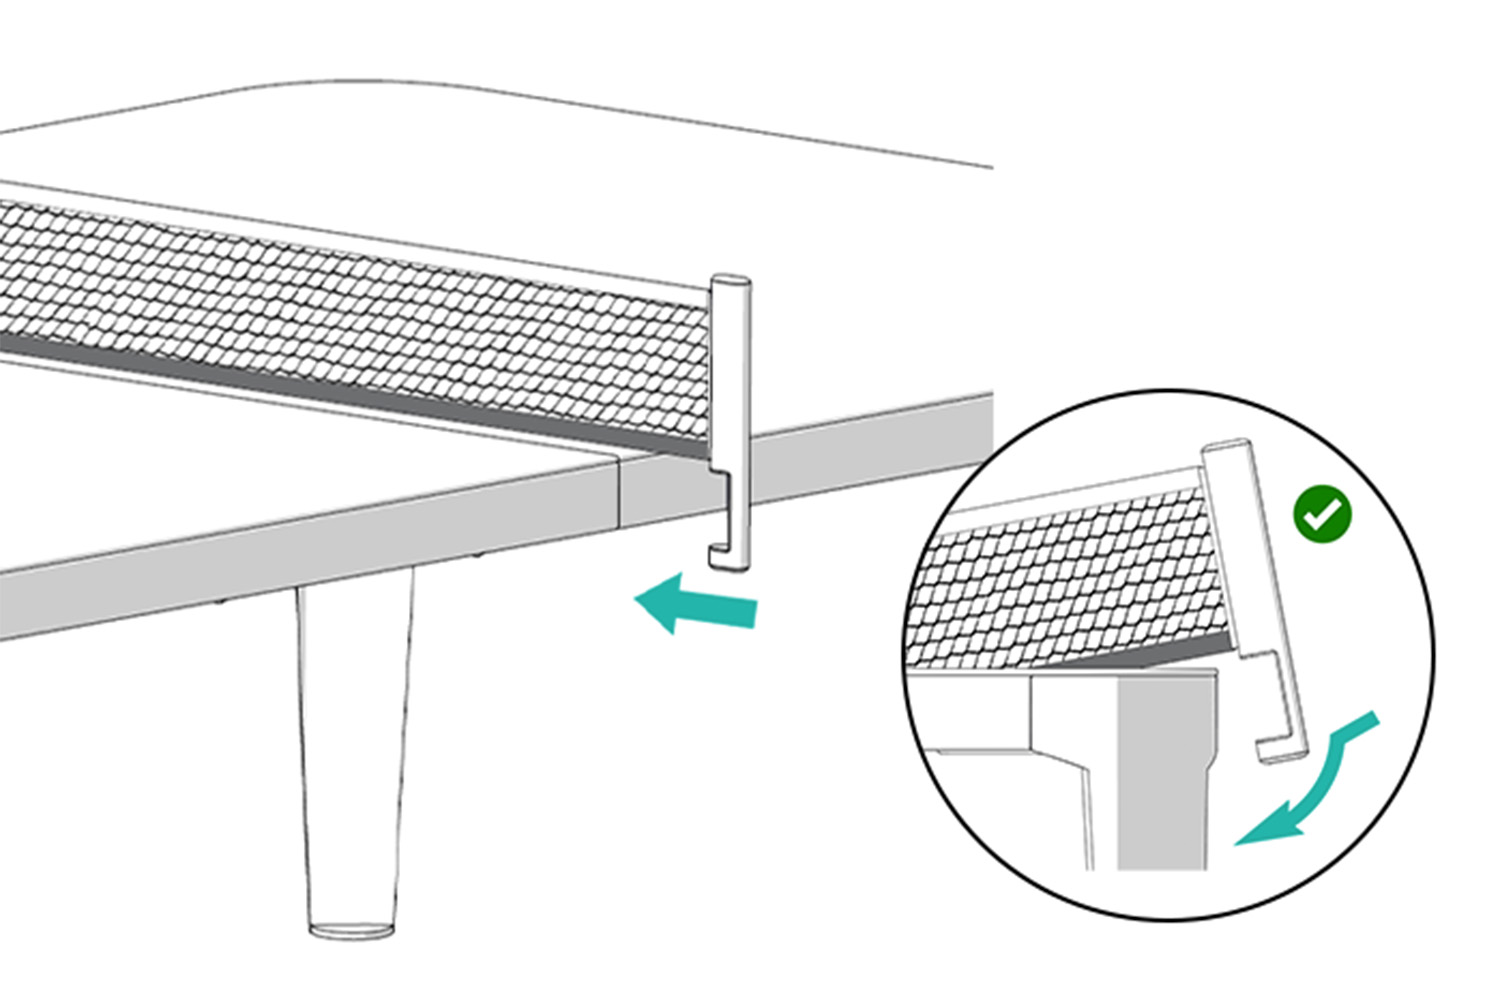
Place the posts on the frame at the junction where the two tabletops meet.